Thinking about upgrading your floors with hybrid flooring? You’re making a smart choice. Hybrid flooring has become one of the most popular flooring options for Gold Coast homes, and for good reason. It combines the best features of laminate and vinyl to create a durable, waterproof, and stylish floor that can handle everything from beach sand to busy family life.
Whether you’re a DIY enthusiast ready to tackle your first flooring project or considering professional installation, this guide will walk you through everything you need to know about laying hybrid flooring. From understanding what makes hybrid flooring special to step-by-step installation instructions, we’ve got you covered.
At Award Carpets Gold Coast, we’ve been helping locals transform their homes with quality flooring for over 30 years. We’ve seen firsthand how hybrid flooring performs in our unique coastal climate, and we’re here to share our expertise.
Introduction to Hybrid Flooring
What Is Hybrid Flooring?
Hybrid flooring is an innovative flooring solution that’s taken the Australian market by storm. It’s a rigid core flooring product that sits between traditional laminate and vinyl plank flooring, offering the best characteristics of both. The “hybrid” name comes from its unique construction method, which blends different materials to create a super-strong, waterproof floor that looks stunning and performs brilliantly.
Unlike traditional timber or standard vinyl, hybrid flooring features multiple layers working together. This engineered approach means you get a floor that’s tougher than laminate, more stable than vinyl, and more affordable than hardwood—without sacrificing style.
Composition: Combining Laminate and Vinyl Benefits
The secret to hybrid flooring’s impressive performance lies in its layered construction. Typically, hybrid flooring consists of four to six layers, each serving a specific purpose:
- Wear layer: A protective UV-coated layer that resists scratches, stains, and fading
- Decorative layer: A high-resolution image that can replicate timber, stone, or contemporary designs
- Rigid core layer: Usually made from Stone Plastic Composite (SPC) or Wood Plastic Composite (WPC), this is the backbone of the flooring
- Acoustic backing: An integrated underlay that provides sound absorption and comfort underfoot
- Waterproof barrier: Built-in moisture protection throughout the entire plank
This sophisticated layering system creates a floor that’s dimensionally stable, meaning it won’t expand or contract with temperature changes the way timber or standard laminate might. The rigid core also provides excellent impact resistance, making it perfect for high-traffic areas.
How It Differs From Traditional Flooring Options
Hybrid flooring stands apart from other flooring types in several key ways. Compared to laminate flooring, hybrid is 100% waterproof rather than just water-resistant. While laminate can swell and warp if exposed to moisture for extended periods, hybrid flooring can handle wet conditions without damage.
When compared to vinyl plank flooring, hybrid offers superior stability and density. Traditional luxury vinyl planks can be softer and more prone to indentation from heavy furniture, while hybrid’s rigid core provides a firmer, more stable walking surface.
Unlike solid timber or engineered hardwood, hybrid flooring doesn’t require sealing, polishing, or ongoing maintenance treatments. It won’t scratch as easily, won’t absorb moisture, and maintains its appearance with minimal effort. Plus, it’s typically half the cost of quality timber flooring while delivering a similar aesthetic appeal.
Why Hybrid Flooring Is Popular
The popularity of hybrid flooring continues to grow, and it’s easy to see why. Gold Coast homeowners are choosing hybrid for their renovations and new builds because it ticks all the boxes: durability, style, practicality, and value.
In our coastal environment, where humidity and moisture are constant considerations, having a completely waterproof floor provides real peace of mind. You don’t need to worry about wet towels, spilled drinks, or tracked-in rainwater causing permanent damage.
The click-lock installation system makes hybrid flooring accessible for DIY projects, which appeals to budget-conscious renovators. At the same time, the professional finish and premium appearance satisfy homeowners who want their floors to look high-end.
Durability for High-Traffic Areas
Hybrid flooring is built to handle the busiest areas of your home. The rigid core construction and protective wear layer mean this flooring can withstand heavy foot traffic, furniture movement, and daily wear without showing signs of damage.
For Gold Coast families with kids running in and out, pets padding around, and constant activity, hybrid flooring offers impressive resilience. The wear layer protects against scratches from pet claws, scuff marks from shoes, and everyday impacts that would damage softer flooring types.
Commercial-grade hybrid flooring options are even available for businesses or extremely high-traffic residential areas, offering enhanced durability ratings that can last decades under demanding conditions.
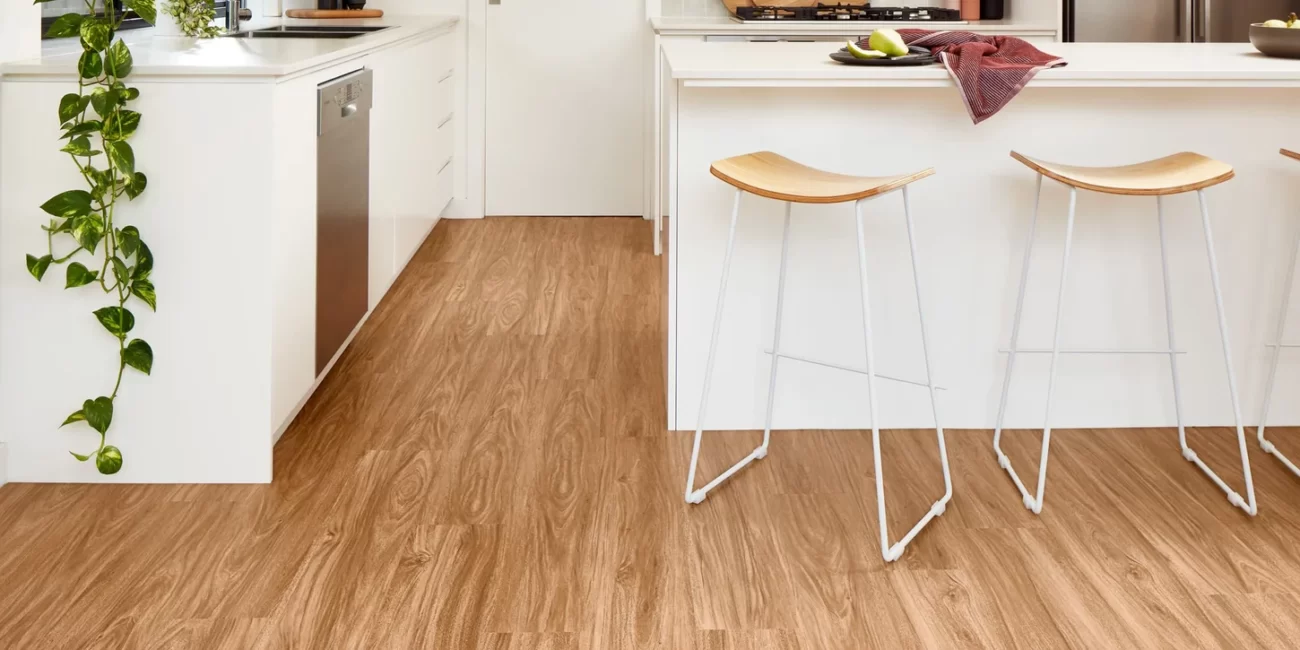
Waterproof Features for Kitchens and Bathrooms
One of hybrid flooring’s standout features is its complete waterproof construction. Unlike laminate, which can only tolerate minimal moisture exposure, hybrid flooring can be installed in wet areas without concern.
This makes it an excellent choice for kitchens, where spills are inevitable, and bathrooms, where steam and water splashes are part of daily life. Many Gold Coast homeowners also install hybrid flooring in laundries, mudrooms, and even outdoor covered entertaining areas.
The waterproof properties don’t just protect against surface water—the entire plank is moisture-resistant, meaning even if water somehow gets underneath (which is rare with proper installation), it won’t cause swelling, warping, or mould growth.
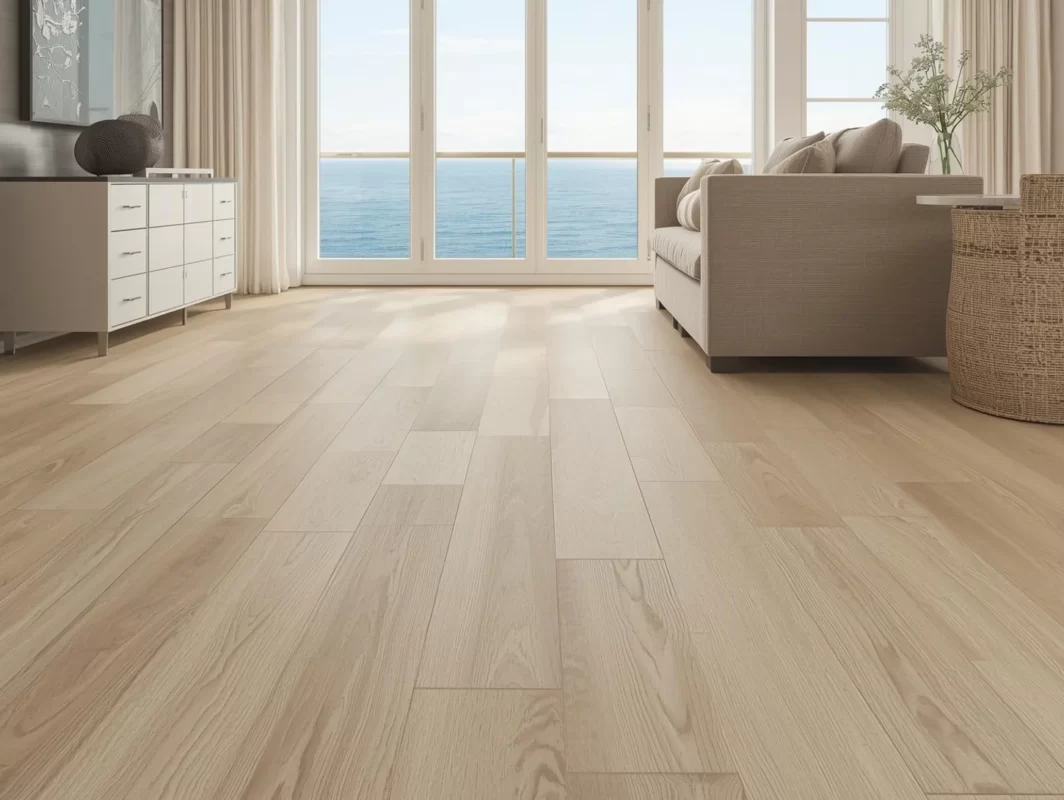
Aesthetic Flexibility for Modern Homes
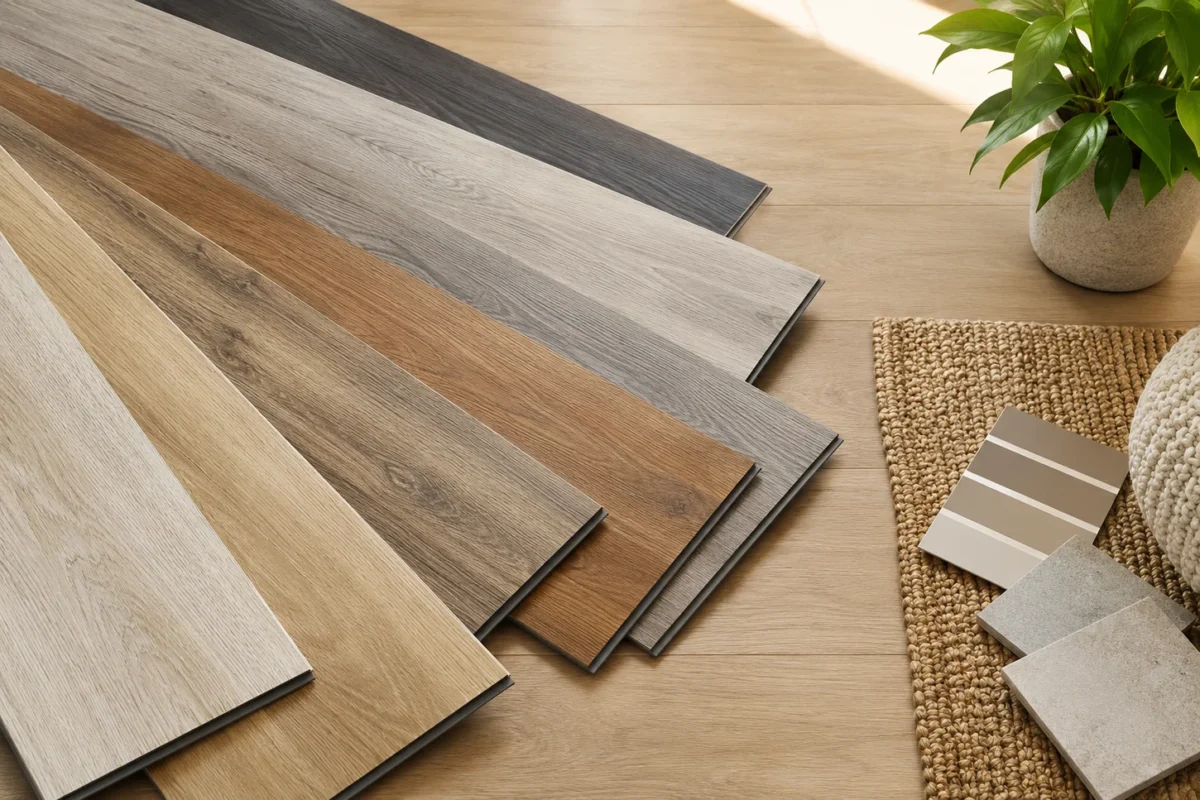
Today’s hybrid flooring comes in an incredible range of colours, textures, and styles. Whether you prefer the classic look of oak timber, the contemporary appeal of grey tones, or the natural variation of stone effects, there’s a hybrid option to match.
Plank widths vary from narrow traditional boards to wide modern planks, and surface textures range from smooth to hand-scraped and wire-brushed finishes. This variety means you can achieve virtually any design aesthetic, from coastal Hamptons style to industrial warehouse vibes.
The high-resolution printing technology used in quality hybrid flooring creates remarkably realistic visuals. Many people can’t tell the difference between premium hybrid and real timber until they touch it—and even then, the textured embossing can fool the hand as well as the eye.
Who This Guide Is For
This comprehensive guide is designed for anyone considering hybrid flooring installation, whether you’re planning to do it yourself or hire professionals.
DIY Enthusiasts
If you’re comfortable with basic tools and enjoy hands-on home improvement projects, installing hybrid flooring is definitely achievable. The click-lock system is designed to be user-friendly, and with careful planning and patience, you can achieve professional-looking results.
This guide will walk you through every step of the process, from preparing your subfloor to making precise cuts around doorways. We’ll share tips and tricks we’ve learned from years of experience, helping you avoid common mistakes and achieve a flawless finish.
Homeowners Considering Professional Installation
Even if you plan to hire professionals, understanding the installation process helps you make informed decisions and communicate effectively with your installer. You’ll know what to expect, how to prepare your home, and how to evaluate the quality of the finished work.
This knowledge is particularly valuable when choosing between different hybrid flooring products or deciding whether the quoted installation price represents good value. At Award Carpets Gold Coast, we believe educated customers make the best choices for their homes.
Tools and Materials Required
Essential Tools
Having the right tools makes hybrid flooring installation significantly easier and helps you achieve professional results. Most of these tools are readily available at hardware stores, and if you’re a regular DIY enthusiast, you may already own many of them.
Tapping Block and Pull Bar
A tapping block is essential for clicking hybrid flooring planks together without damaging the edges. This specially designed block distributes the force of your hammer taps evenly along the board edge, preventing chips or cracks.
A pull bar (also called an end-pull bar or plank puller) helps you install the last plank in each row, where there’s insufficient space to use a tapping block. It hooks over the short edge of the plank and allows you to draw it tightly into position.
Both tools are inexpensive and specifically designed for floating floor installation. While you might be tempted to improvise with scrap wood, purpose-made tools work far better and protect your investment.
Spacers, Measuring Tape, Pencil
Expansion spacers maintain the crucial gap between your flooring and the walls. These small wedges (usually 10mm thick) keep boards properly positioned during installation and ensure adequate expansion space.
A quality measuring tape (5m or longer) is essential for room measurements and cutting accuracy. A sharp pencil marks cutting lines clearly on the back of planks.
Keep these basic marking and spacing tools close at hand throughout the installation process—you’ll use them constantly.
Saw Options: Hand Saw, Circular Saw, Jigsaw
You’ll need a saw to cut hybrid flooring planks to length and to make cuts around obstacles. Several saw types work well:
A hand saw with fine teeth can make straight cuts quietly and without dust. It’s the most basic option but requires more physical effort.
A circular saw makes quick, straight cuts and is ideal for cutting planks to length. Use a fine-tooth blade designed for laminate or vinyl flooring to prevent chipping.
A jigsaw excels at curved cuts around door frames, pipes, and irregular shapes. It’s invaluable for professional-looking installations around obstacles.
Whichever saw you choose, always cut from the back (underside) of the plank to prevent visible chips on the finished surface.
Rubber Mallet and Level
A rubber mallet provides the gentle force needed to tap planks together without causing damage. Never use a metal hammer directly on the flooring—this will dent or crack the edges.
A spirit level (at least 1m long) helps check that your subfloor is level and ensures your first row of boards is perfectly straight. A laser level is even better if you have access to one, as it can project a straight reference line across the entire room.
Materials Checklist
Beyond tools, you’ll need the actual flooring materials and associated products to complete your installation.
Hybrid Flooring Boards
Calculate your flooring requirements by measuring your room’s length and width, then multiplying to get square meterage. Add 10% extra for cuts and wastage—this is standard practice and ensures you don’t run short mid-installation.
Purchase all your flooring from the same production batch if possible, as colours can vary slightly between batches. Check each box for the batch number before leaving the store.
Inspect boards before installation for any manufacturing defects. While rare with quality hybrid flooring, it’s easier to return damaged boards before you’ve installed them.
Underlay (If Required)
Many hybrid flooring products come with integrated underlay already attached to the bottom of each plank. This built-in underlay provides acoustic insulation and a small amount of cushioning.
If your hybrid flooring doesn’t include attached underlay, you’ll need to purchase and install a separate underlay layer. Look for underlay specifically designed for rigid core flooring—it should be thin, dense, and provide moisture protection.
Some situations require additional underlay even if your hybrid flooring has attached padding. For example, installing over concrete in ground-floor rooms may benefit from extra moisture protection, or rooms above living spaces might need enhanced acoustic underlayment.
Skirting, Trims, and Transition Strips
Skirting boards (baseboards) cover the expansion gap around the room’s perimeter and provide a finished look. You can use new skirting or reinstall existing skirting if you removed it before installation.
Transition strips (also called reducer strips or T-moldings) create a smooth transition between your hybrid flooring and different flooring types or heights. You’ll typically need these at doorways or where your hybrid flooring meets tile, carpet, or existing timber floors.
Scotia (quarter round) molding offers an alternative to skirting, sitting in front of existing baseboards to cover the expansion gap. This works well if you don’t want to remove existing skirting.
Choose trims and skirting that complement your hybrid flooring colour for a cohesive, professional appearance.
Safety Equipment
Protecting yourself during installation is important, particularly when cutting boards and working on your knees for extended periods.
Gloves and Safety Glasses
Work gloves protect your hands from splinters when handling boards and from heat when using power saws. Choose flexible gloves that allow good dexterity for handling small pieces and spacers.
Safety glasses are essential when cutting hybrid flooring with power tools. The saw blade can throw small plastic particles that pose a risk to your eyes. Even with a hand saw, it’s wise to wear eye protection.
Hearing protection is advisable if you’re using a circular saw for extended periods. While not as loud as many power tools, prolonged exposure to saw noise can damage hearing over time.
Knee Pads for Comfort During Installation
Quality knee pads make installation dramatically more comfortable. You’ll spend hours kneeling while fitting boards, and the hard subfloor surface quickly becomes painful on bare or lightly protected knees.
Choose knee pads with thick cushioning and adjustable straps that stay in place while you move around. The investment in good knee pads is worthwhile—you’ll appreciate them more with every board you install.
Preparing for Installation
Proper preparation is the foundation of successful hybrid flooring installation. Rushing this phase often leads to problems later, so invest the time to prepare correctly from the start.
Acclimatising Your Flooring
Hybrid flooring needs to adjust to your home’s temperature and humidity before installation. This acclimatisation process helps prevent expansion or contraction issues after the floor is laid.
How Long Boards Should Sit in the Room
Store unopened boxes of hybrid flooring in the room where they’ll be installed for at least 48 hours before beginning work. This allows the flooring to reach equilibrium with the room’s conditions.
Stack boxes flat, no more than four boxes high, and keep them away from direct sunlight or heat sources. Don’t store boxes in a garage or outdoor area—they need to be in the actual installation environment.
For large installations or if the flooring has been stored in significantly different conditions, 72 hours of acclimatisation is even better.
Temperature and Humidity Considerations
Maintain room temperature between 18-27°C during the acclimatisation period and installation. Avoid installing hybrid flooring in extremely cold or hot conditions, as this can affect the clicking mechanism and final fit.
Gold Coast’s humidity generally sits within acceptable ranges for hybrid flooring installation, but if you’re installing during particularly humid weather or in a room without climate control, allow extra acclimatisation time.
Keep windows and doors closed during acclimatisation to maintain stable conditions. If you’re installing in a new home or renovation before air conditioning is operational, consider timing the installation for milder weather.
Inspecting and Preparing the Subfloor
The subfloor is the foundation beneath your hybrid flooring, and its condition directly impacts your installation’s success and longevity.
Cleaning and Removing Debris
Thoroughly sweep and vacuum the subfloor before installation. Even small particles can create bumps or squeaks in the finished floor, so be meticulous about cleaning.
Remove all staples, nails, tacks, or other debris from old flooring removal. Use pliers to pull stubborn staples completely out—don’t just hammer them flat, as they can still create raised spots.
If you’ve removed carpet, check carefully for any adhesive residue or padding fragments. These must be completely removed or leveled before laying hybrid flooring.
Checking for Uneven Surfaces
Hybrid flooring requires a relatively level subfloor to perform properly. Check for level using a long straight edge or spirit level. The subfloor should be flat within 3mm over any 1-meter span.
High spots can be sanded or ground down with a concrete grinder (for concrete subfloors) or sanded (for timber subfloors). Low spots should be filled with a suitable leveling compound.
Pay particular attention to transitions between different subfloor materials or at doorways, where height differences commonly occur.
Moisture Testing and Fixing Damp Issues
While hybrid flooring is waterproof, moisture in the subfloor can still cause problems. Excessive moisture can prevent proper adhesion of transition strips or lead to mould growth underneath the floor.
For concrete subfloors, conduct a simple moisture test by taping a plastic sheet to the floor and leaving it for 24 hours. If condensation appears on the underside, you have a moisture issue that needs addressing before installation.
Moisture barriers or additional underlay with moisture-blocking properties can solve minor moisture concerns. Serious moisture issues may require professional assessment and remediation before you proceed with flooring installation.
Planning Your Layout
Thoughtful layout planning creates better visual results and makes the installation process smoother.
Measuring Room Dimensions
Accurately measure your room’s length and width at multiple points—rooms are rarely perfectly square. Use the longest measurements to ensure you order enough flooring.
Draw a simple floor plan showing the room shape, doorways, built-in furniture, and any obstacles like pipes or heating vents. This helps visualize your layout and plan cuts in advance.
Deciding on Board Orientation
Typically, hybrid flooring looks best installed parallel to the longest wall or following the main source of natural light in the room. This creates a sense of flow and makes the room feel more spacious.
In hallways, install boards running lengthwise down the corridor. This creates visual continuity and minimizes the number of end joints you’ll see when walking through the space.
Consider the adjoining rooms if you’re installing hybrid flooring throughout multiple spaces. Maintaining the same board direction creates cohesion between rooms and makes the installation easier at doorways.
Staggering Boards for Natural Appearance
Avoid patterns where end joints line up or repeat regularly—this creates an artificial “H-joint” or “ladder” pattern that looks unprofessional. Plan to stagger end joints by at least 30cm between adjacent rows.
A good approach is to start the second row with the cutoff piece from the end of the first row (assuming it’s at least 30cm long). This naturally creates staggered joints while minimizing waste.
Random staggering that varies between 30-50cm creates the most natural timber-look appearance and ensures strong structural integrity across the entire floor.
Accounting for Doorways and Obstacles
Plan how your flooring will transition at doorways. You’ll typically need to trim door frames and install transition strips or reducer moldings at these points.
Measure and mark the locations of heating vents, pipes, or other floor penetrations. Plan which plank will cover each obstacle and how you’ll cut around it before you begin installation.
For complex rooms with bay windows, alcoves, or irregular shapes, start installation in the main rectangular section and work outward toward the complex areas. This ensures your main floor area looks straight and professional.
Step-by-Step Guide to Laying Hybrid Flooring
Now for the practical installation process. Take your time with each step, and remember that patience and precision produce the best results.
Step 1 – Prepare the Base
Proper base preparation sets the foundation for everything that follows.
Remove Old Flooring or Carpets
In most cases, you’ll want to remove existing flooring before installing hybrid. While you can sometimes install over existing hard flooring, starting with a clean subfloor gives the best results.
Remove carpet by cutting it into manageable strips, rolling it up, and disposing of it. Pull up the underlay and remove all staples and tack strips around the perimeter.
For existing tile or timber, assess the condition carefully. If it’s firmly adhered, level, and in good condition, you may be able to install over it. If there are loose tiles, significant height variations, or damage, removal is necessary.
Check Floor is Clean, Dry, and Level
Once old flooring is removed, sweep and vacuum thoroughly. Check again for level using a straight edge or level, and address any issues found.
Ensure the subfloor is completely dry. If you’ve recently cleaned or if there’s been any moisture exposure, allow adequate drying time before proceeding.
For concrete subfloors, check that any recent patching or leveling compound has fully cured according to the manufacturer’s specifications.
Remove Baseboards if Needed
Removing existing baseboards (skirting boards) before installation creates the cleanest finish. Carefully pry them away from the wall using a flat pry bar, working slowly to minimize damage.
Number each piece on the back and note its location if you plan to reinstall the same skirting. Store removed baseboards safely where they won’t be damaged during installation.
If you prefer not to remove baseboards, plan to install scotia (quarter round) molding after the flooring is complete. This covers the expansion gap while leaving existing skirting in place.
Step 2 – Lay Underlay (If Required)
If your hybrid flooring doesn’t have integrated underlay, or if you need additional moisture or acoustic protection, install underlay before proceeding.
When Underlay Is Necessary
Separate underlay is required if your hybrid flooring doesn’t include attached padding. Check the manufacturer’s specifications—most quality hybrid flooring now comes with integrated underlay for convenience.
Additional underlay may be beneficial for ground-floor rooms over concrete, where extra moisture protection provides peace of mind. It’s also valuable in upstairs rooms where enhanced sound insulation benefits the rooms below.
Never “double up” underlay by adding a separate layer under hybrid flooring that already has integrated padding. This creates too much cushioning and can prevent the locking system from functioning properly.
How to Roll Out and Cut Underlay
Unroll underlay perpendicular to the direction you’ll install the flooring boards. This creates a stable base and prevents the underlay from shifting during installation.
Cut underlay to fit using a sharp utility knife. Make cuts slightly smaller than the room dimensions so the underlay doesn’t extend up the walls.
Some underlays have a vapor barrier built in, which should face downward (toward the subfloor) for concrete bases.
Securing Underlay Without Gaps or Overlaps
Most underlay products designed for floating floors should be butted together without gaps or overlaps. Some types have tape strips along the edges for joining sections together.
Don’t staple or glue underlay to the subfloor—it needs to float freely with the hybrid flooring above it. The weight of the flooring will hold it in place once installation is complete.
Walk across the underlay to check that it’s smooth and flat, with no bubbles or wrinkles that could create imperfections in your finished floor.
Step 3 – Install the First Row of Boards
The first row is crucial—if it’s straight and properly positioned, the rest of the installation will follow smoothly.
Starting Along the Longest Wall
Choose the longest, straightest wall as your starting point. This typically creates the best visual result and simplifies installation.
If your starting wall isn’t perfectly straight, you may need to scribe and cut the first row of boards to follow the wall’s contour while keeping the outer edge straight. This ensures subsequent rows remain straight even if your walls aren’t.
Using Spacers for Expansion Gaps
Place 10mm spacers between the first row of boards and the wall at regular intervals. These spacers maintain the crucial expansion gap that allows the floor to expand and contract with temperature and humidity changes.
Maintaining this expansion gap around the entire perimeter is essential. Hybrid flooring needs room to move—without this space, the floor can buckle or develop gaps as it expands.
Ensuring Straight Alignment
Before clicking the first row together, lay the boards in position and use a long level or chalk line to ensure they’re perfectly straight. This straight first row is your reference for the entire floor.
Check that the tongue edge (the protruding edge of the click-lock system) faces the wall, with the groove edge facing into the room. This orientation makes installation easier.
Once you’re satisfied the first row is straight and properly spaced from the wall, click the boards together end-to-end. You’ll likely need to cut the last board in the row to length.
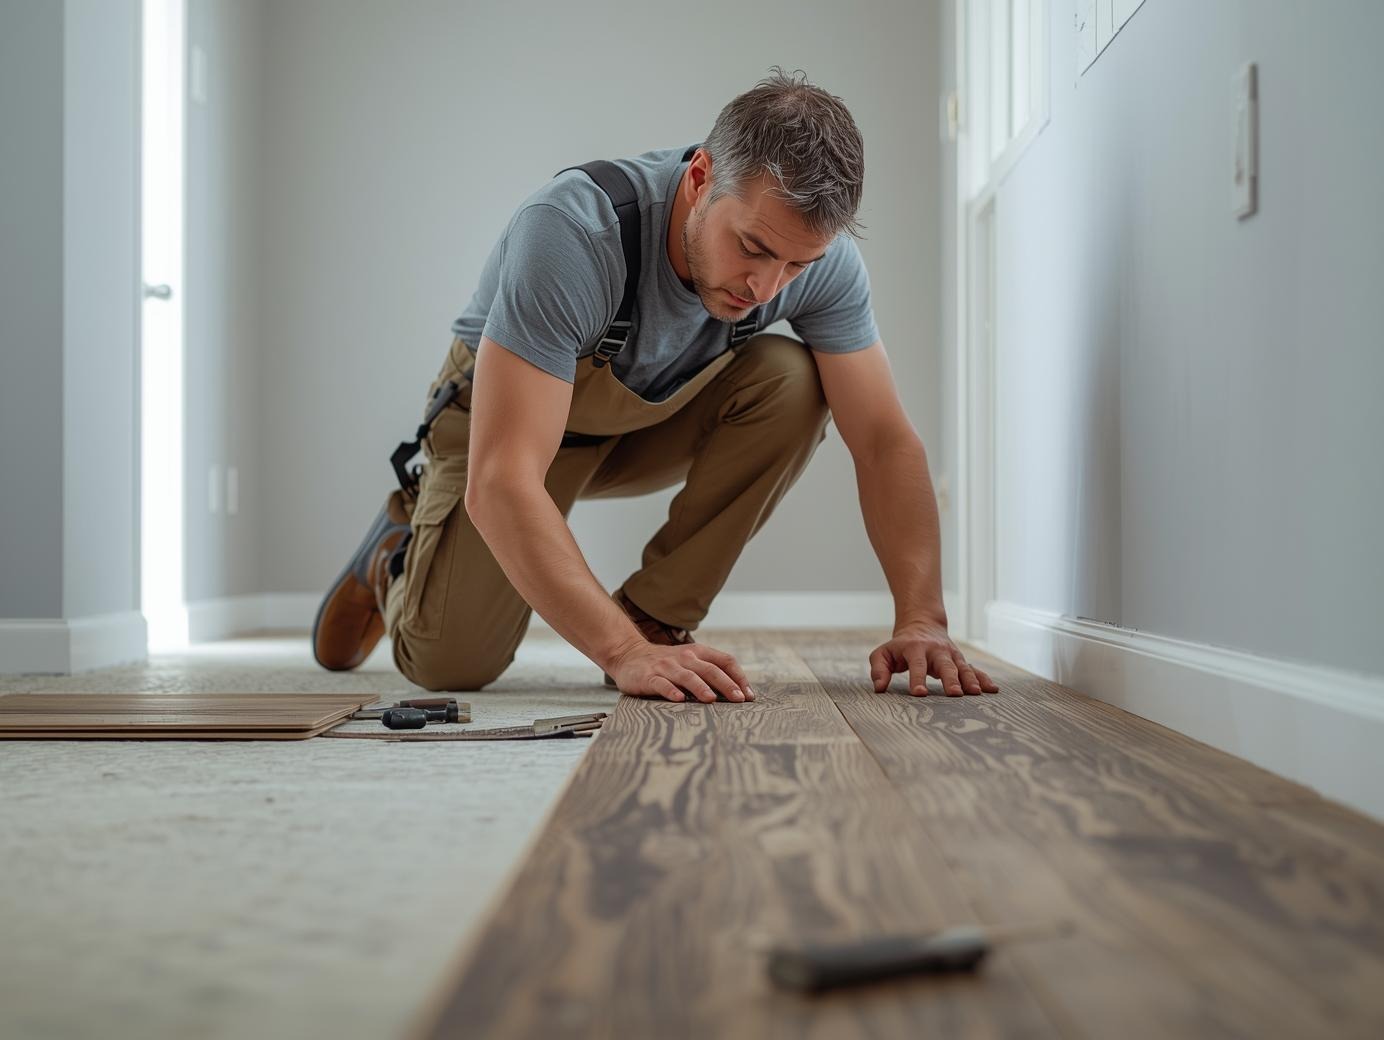
Step 4 – Connecting Subsequent Boards
With the first row complete, you’ll develop a rhythm as you work across the room.
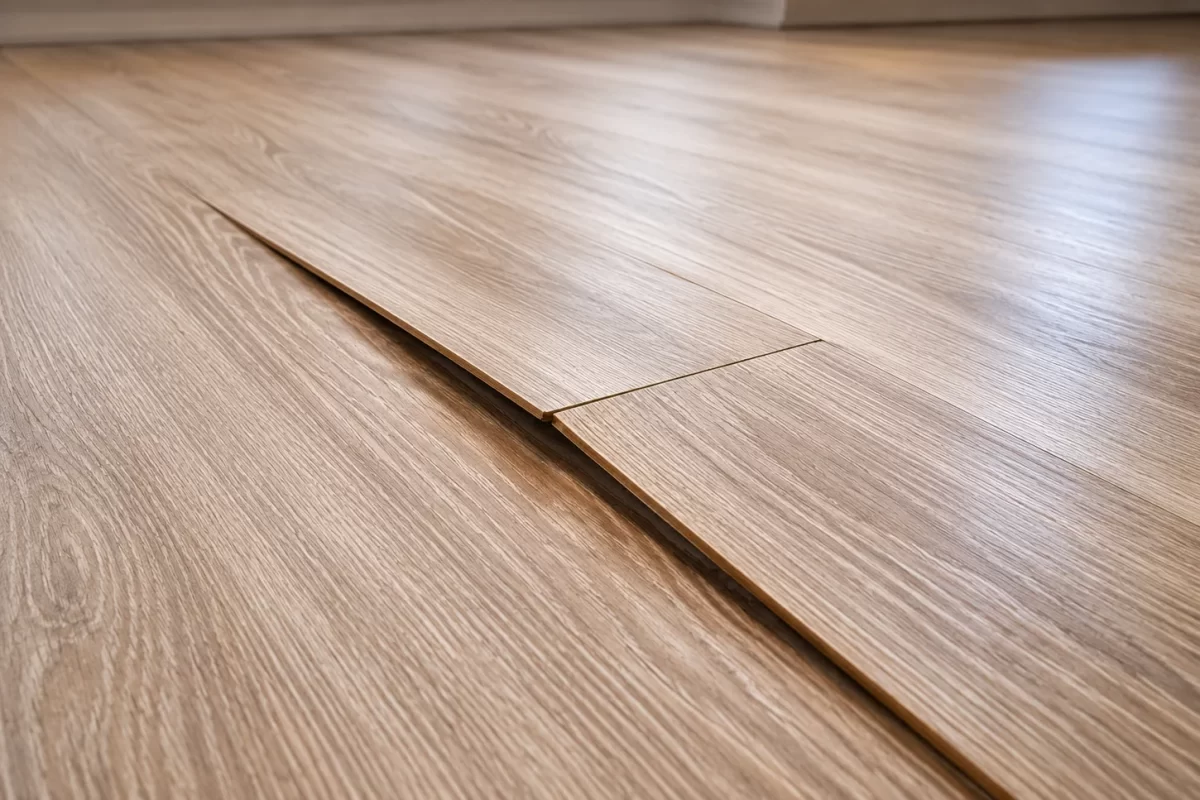
Locking Boards Together Properly
Hybrid flooring typically uses an angle-tap or click-lock system. For angle-tap installations, insert the tongue of the new board into the groove of the installed board at approximately a 20-30 degree angle, then lower the board flat while applying slight pressure. You should hear and feel a distinct click when the boards lock together.
For click-lock systems, boards simply click together horizontally without the angling step. These are even easier for beginners but less common in rigid core hybrid flooring.
Always connect the long edge first (connecting the new row to the previous row), then tap the short ends together to complete the join.
Tapping Boards Without Damaging Edges
Use your tapping block and rubber mallet to close small gaps between boards. Place the tapping block against the board edge and tap gently—the goal is to close the gap, not to force the boards together with heavy blows.
Work from one end of the board to the other, closing the entire length progressively rather than focusing on one spot. This distributes stress evenly and prevents edge damage.
If a board seems resistant to joining, double-check that the tongues and grooves are clean and undamaged. A small piece of debris can prevent proper locking.
Maintaining Consistent Expansion Gaps
Keep spacers in place against the walls as you progress across the room. It’s easy to accidentally push the floor tight against the wall while installing boards—the spacers prevent this.
Check the gap periodically to ensure it remains consistent. If boards are pushed too close to walls, carefully insert your pull bar and use it to shift the entire floor section slightly away from the wall.
Step 5 – Staggering Boards for a Natural Look
Proper staggering creates a professional appearance and structural integrity.
Recommended Staggering Distance
Maintain at least 30cm between end joints in adjacent rows. This minimum distance ensures the locking system works effectively and prevents the floor from feeling weak at these points.
Ideally, vary the stagger distance between rows rather than maintaining a consistent pattern. Natural timber floors have random plank lengths, and mimicking this randomness creates the most realistic appearance.
Avoiding Repeating Patterns
Watch for unintentional patterns developing as you work. If you notice end joints starting to line up or create diagonal patterns, adjust your layout by using different length offcuts to start subsequent rows.
Step back periodically to view the overall floor from a distance. Patterns that aren’t obvious close-up may be noticeable when viewing the entire floor, especially in good lighting.
Ensuring Structural Integrity
Proper staggering isn’t just aesthetic—it distributes loads across the floor and prevents sections from lifting or separating. Think of it like bricklaying, where staggered joints create strength.
Avoid installing any board shorter than 30cm. These short pieces don’t lock securely and create weak points in your floor. If your final piece in a row would be too short, cut a longer board in the previous row to adjust.
Step 6 – Cutting Around Doors, Vents, and Corners
Precision cuts around obstacles separate professional-looking installations from amateur efforts.
Measuring Cut Areas Accurately
For door frames, slide a scrap piece of hybrid flooring under the frame to determine the correct cutting height. Use a flush-cut saw or oscillating multi-tool to undercut the frame, allowing the flooring to slide beneath.
Measure twice, cut once—this old carpenter’s wisdom prevents costly mistakes. When measuring for cuts around obstacles, measure from the wall (including your expansion gap) rather than from the last installed board, as small discrepancies can accumulate.
For pipes or other round obstacles, measure the pipe’s position from two walls, transfer these measurements to your board, and drill a hole slightly larger than the pipe diameter. You’ll typically need to cut the board in half to install it around the pipe, rejoining the pieces afterward.
Using a Jigsaw or Handsaw Safely
When using a jigsaw, secure the board firmly to prevent vibration. Cut slowly and steadily, following your marked line carefully. Let the saw do the work—don’t force it through the material.
Always wear safety glasses when cutting, and ensure your work area is well-ventilated if cutting indoors. The dust from cutting hybrid flooring is fine and can be irritating to breathe.
For straight cuts, a circular saw with a guide or a hand saw works well. For irregular shapes around door frames or decorative features, a jigsaw offers the necessary maneuverability.
Maintaining Clean Edges for a Professional Finish
Cut from the back of the board when possible to prevent chipping on the visible surface. If you must cut from the front, use a fine-tooth blade and score the cutting line first with a utility knife.
Smooth any rough edges after cutting with fine sandpaper or a sanding block. While these edges will typically be hidden by skirting or trim, smooth edges prevent catching or splitting.
Test-fit complex cuts before applying any adhesive or making the cut permanent. Use cardboard templates for particularly tricky shapes—they’re easier to trim and adjust than hybrid flooring.
Step 7 – Install Final Rows and Trims
Finishing touches complete the installation and create a polished appearance.
Pulling Boards Tight Against the Wall
The final rows often require careful fitting, especially if the wall isn’t perfectly straight. You may need to measure and cut boards lengthwise to fit the remaining space while maintaining your expansion gap.
Use your pull bar to draw the last row of boards tightly into the locking system. There often isn’t enough room to tap these boards from the outside, so the pull bar becomes essential.
If the final row requires boards narrower than 5cm, consider cutting the second-to-last row slightly narrower so the final row has a more substantial width. This looks better and locks more securely.
Installing Skirting Boards and Transition Strips
Once all flooring is installed, remove the expansion spacers. Install your skirting boards to cover the expansion gap, nailing them to the wall (not the flooring—remember, the floor must float freely).
At doorways and transitions to other flooring types, install appropriate transition strips. These strips typically attach to the subfloor with screws or adhesive, bridging between the different flooring heights.
Choose transition strip styles that complement your hybrid flooring. Options include T-moldings for equal heights, reducers for transitions to lower floors, and stair nosing for step edges.
Checking Gaps and Adjusting if Necessary
Walk across the entire floor, checking for any gaps between boards or areas where the floor feels hollow or squeaky. Small gaps in the locking system can often be closed by re-tapping with your tapping block.
Check that all transition strips sit flush and secure. Trim any underlay that’s visible at edges, and ensure no debris is trapped under transition strips that could create unevenness.
Inspect the floor from multiple angles and in different lighting conditions. This is your opportunity to address any minor issues before considering the installation complete.
Step 8 – Clean Up and Initial Care
The final step completes your installation and protects your investment.
Removing Spacers and Debris
Carefully remove all expansion spacers from around the room perimeter. Check thoroughly—it’s easy to miss a spacer hidden in a corner or behind a door.
Vacuum the entire floor, paying particular attention to the expansion gap and corners where dust from cutting accumulates. Use your vacuum’s hard floor setting or a soft brush attachment to avoid any risk of scratching.
Wipe the floor with a slightly damp microfiber mop to remove any remaining dust film. This initial clean prepares the floor for use and lets you inspect it closely for any missed issues.
Initial Cleaning Methods
For the first cleaning after installation, plain water or a very mild pH-neutral cleaner is ideal. Avoid harsh chemicals that might damage the wear layer’s factory finish.
Don’t use a soaking wet mop—hybrid flooring is waterproof, but water can potentially seep into seams or under skirting if used excessively. A damp mop provides adequate cleaning without risks.
First Use Recommendations
Wait at least 24 hours before replacing furniture or allowing heavy traffic on new hybrid flooring. This allows any settling to occur and ensures the locking system is fully engaged.
When replacing furniture, use felt pads or furniture sliders to protect the floor. Never drag heavy furniture directly across the new flooring—lift and carry, or use sliders designed for hard floors.
For the first few days, monitor the floor for any signs of movement, gaps appearing, or sections that sound hollow when walked on. Address any issues immediately while installation materials and tools are still accessible.
Common Installation Mistakes to Avoid
Learning from others’ mistakes helps you avoid common pitfalls during your installation.
Skipping Acclimatisation
Installing hybrid flooring straight from the delivery truck is one of the most common mistakes. Flooring that hasn’t acclimatised can expand or contract after installation, creating gaps or buckling.
Even though hybrid flooring is more dimensionally stable than laminate or timber, it still benefits from acclimatisation. The 48-hour waiting period may seem inconvenient, but it’s far easier than repairing a floor that develops problems later.
Store flooring boxes in the installation room, not in a garage or outdoor area with different temperature and humidity conditions.
Poor Subfloor Preparation
Installing over a dirty, uneven, or damp subfloor causes numerous problems. Small debris creates squeaks and bumps, while uneven surfaces prevent proper locking and can cause boards to separate.
Take time to thoroughly clean, level, and dry your subfloor. This preparation work isn’t exciting, but it’s critical to your floor’s performance and longevity.
If you’re uncertain about your subfloor’s condition, invest in professional assessment. Fixing subfloor issues after installation is far more expensive than addressing them beforehand.
Incorrect Board Alignment or Spacing
Failing to maintain the expansion gap causes buckling and damage. As the floor expands with heat or humidity, it needs somewhere to go—if there’s no gap, boards push against walls and lift or warp.
Starting with a crooked first row compounds throughout the installation, resulting in a floor that looks obviously wrong. Double-check that first row’s alignment before proceeding further.
Poor staggering creates weak points and an unprofessional appearance. Follow the minimum 30cm stagger rule consistently throughout the installation.
Using Wrong Tools or Forceful Tapping
Using a metal hammer directly on boards or tapping too aggressively damages the locking system. Once these edges are damaged, boards won’t click together properly or will separate over time.
Invest in proper installation tools—a rubber mallet, tapping block, and pull bar cost less than replacing damaged boards and make installation dramatically easier.
If boards aren’t clicking together easily, investigate why rather than forcing them. Usually, a small piece of debris or a damaged tongue/groove is the culprit.
Skipping Transition Strips and Trims
Leaving expansion gaps exposed looks unfinished and allows debris to collect. Always plan for skirting, scotia, or appropriate trims to cover these necessary gaps.
At doorways, transition strips protect board edges from chipping and create a professional appearance. Skipping these creates trip hazards and exposes the flooring to damage.
Match transition strips to your flooring color for the most cohesive look, or choose complementary metallic finishes for contemporary spaces.
Rushing Installation Leading to Gaps or Damage
Quality installation takes time. Rushing through the process leads to gaps between boards, damaged edges, and poor cuts around obstacles.
Plan adequate time for your installation. For a standard bedroom, allow a full day including subfloor preparation, acclimatisation time, and installation. Larger or more complex rooms require proportionally more time.
If you’re tired or frustrated, take a break. Most mistakes happen when you’re rushing to finish or pushing through fatigue.
Installation Time
Understanding the time investment helps you plan your project realistically.
Estimated Time for DIY Installation
Installation speed varies with experience, room complexity, and the number of obstacles you encounter.
Small Rooms vs Large Rooms
A small bedroom or bathroom (10-15 square meters) typically takes one person 4-6 hours to install after subfloor preparation is complete. This includes measuring, cutting, and fitting boards plus installing trims.
Large open-plan areas (30-40 square meters) can take 8-12 hours for a solo DIY installer. Having a helper speeds the process significantly, as one person can measure and cut while the other installs.
These estimates assume you have some DIY experience and the right tools. First-time installers should allow extra time for learning the technique and problem-solving.
Factors Affecting Duration (Complex Cuts, Obstacles)
Simple rectangular rooms install fastest. Each doorway, built-in feature, or obstacle adds time for measuring, cutting, and fitting.
Rooms with bay windows, alcoves, or irregular shapes can double installation time. These complex areas require careful planning and precision cutting.
The quality of your subfloor preparation also impacts installation speed. A level, clean, dry subfloor makes installation straightforward, while dealing with subfloor issues during installation creates delays.
Professional Installation Timeline
Professional installers work much faster than DIY enthusiasts due to experience and specialized tools.
A professional team can typically install 40-50 square meters of hybrid flooring in a single day, including subfloor preparation and finishing touches. Complex rooms or whole-house installations may extend to 2-3 days.
Professionals also have access to specialized equipment like power nailers for skirting boards and professional-grade cutting tools that speed the process while maintaining quality.
Benefits of Hiring Experts
Beyond speed, professional installation offers several advantages. Experienced installers identify potential issues before they become problems and know how to handle complex situations.
Professional installation usually includes warranty coverage on both materials and labour. If problems develop, the installer returns to fix them at no cost to you.
For homeowners who value their time or lack confidence in their DIY skills, professional installation provides peace of mind. You receive a flawless floor without the stress of installation.
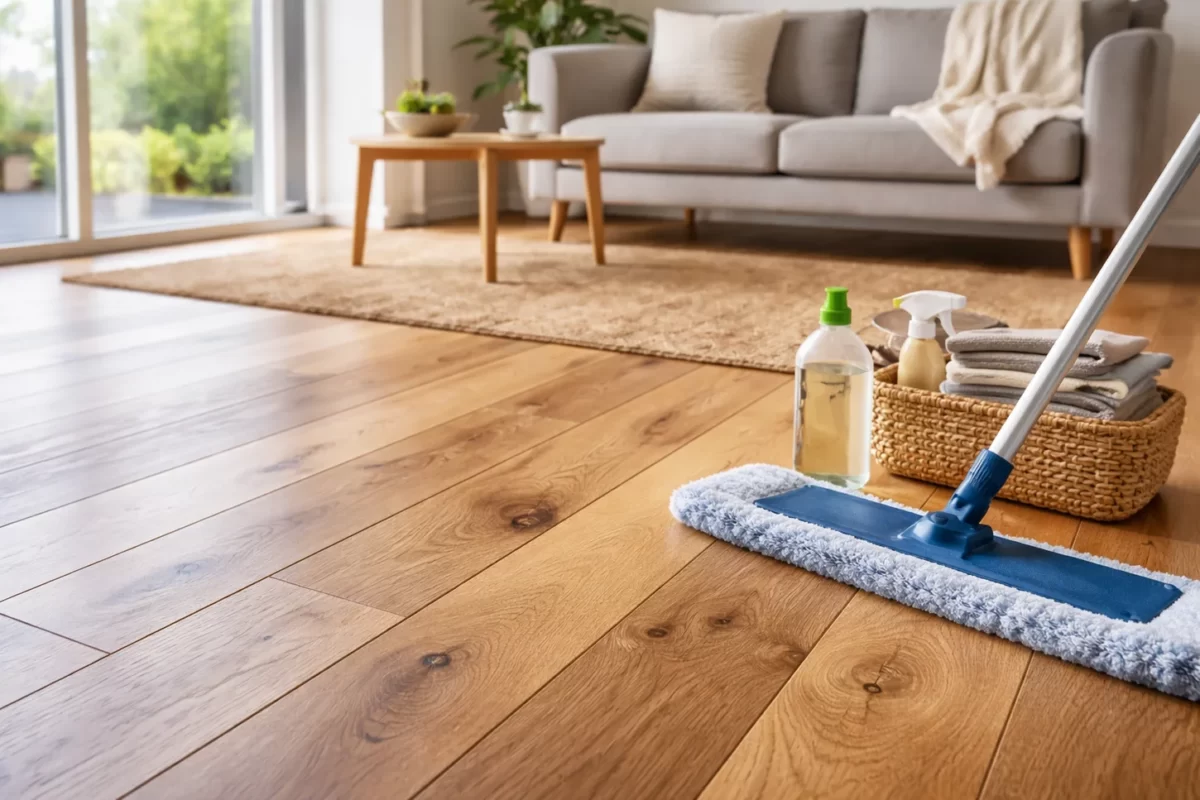
Maintaining Hybrid Flooring
Proper maintenance keeps your hybrid flooring looking new for decades while minimizing effort.
Routine Cleaning and Dusting
Daily or regular sweeping or vacuuming prevents dirt accumulation and maintains your floor’s appearance. Dirt particles act like sandpaper underfoot, potentially dulling the wear layer over time.
Use a soft-bristle broom or a vacuum with a hard floor attachment. Beater bars on vacuums can be too aggressive, though they won’t damage hybrid flooring the way they might timber.
For quick clean-ups, dry microfiber mops attract dust and dirt without requiring water. Keep one handy for regular touch-ups between deeper cleaning sessions.
Handling Spills and Stains Promptly
Hybrid flooring’s waterproof nature makes spill management easy. Simply wipe up liquids with a cloth or paper towel—no urgent rush is needed, as the waterproof surface won’t stain or absorb moisture.
For sticky spills or food debris, use a slightly damp cloth with warm water. Most substances wipe away without specialized cleaners.
Avoid letting acidic substances like wine, cordial, or citrus juice sit on the floor indefinitely, though hybrid flooring resists staining far better than timber or laminate. Quick cleaning is still good practice.
Avoiding Scratches and Damage from Furniture
Felt pads under furniture legs prevent scratches when chairs are moved or tables are adjusted. Replace these pads periodically as they wear down.
Use furniture sliders when moving heavy items like sofas or bookcases. While hybrid flooring is scratch-resistant, dragging very heavy objects can still mark the surface.
For office chairs or dining chairs that move frequently, consider a floor mat in these high-wear areas. Clear mats won’t affect your floor’s appearance while providing extra protection.
Long-Term Care Tips for Longevity
Avoid steam mops, though they’re tempting for their convenience. The heat and moisture can potentially damage the locking system over time, even though the surface is waterproof.
Use only pH-neutral cleaners designed for hybrid or vinyl flooring. Harsh chemicals, abrasive cleaners, and wax products can damage the protective wear layer.
Place mats at exterior doors to trap dirt and moisture before it reaches your flooring. This simple step dramatically reduces wear and maintains your floor’s appearance.
Trim pets’ nails regularly and clean up any accidents promptly. While hybrid flooring resists pet damage better than alternatives, basic pet care still helps preserve your investment.
Choosing the Right Hybrid Flooring for Your Home
Selecting the appropriate hybrid flooring ensures you achieve the performance and appearance you want.
Selecting Board Colour, Texture, and Size
Consider your existing or planned interior design when choosing board color. Sample boards at home in your actual lighting conditions before making final decisions—flooring can look quite different in showroom lighting versus natural light in your space.
Think about your lifestyle when selecting color. Light floors show less dust but may show scratches more readily. Dark floors hide scratches well but show every dust particle. Mid-tones offer a practical balance for busy households.
Texture affects both appearance and practicality. Smooth surfaces feel sleek and modern, while textured surfaces hide minor wear better and provide better slip resistance in wet areas.
Plank width influences perception of space. Wide planks (180-220mm) create contemporary appeal and can make small rooms feel larger. Traditional narrower planks (120-150mm) suit classic interiors and create less waste in irregular-shaped rooms.
Waterproof vs Water-Resistant Options
True hybrid flooring should be fully waterproof, not just water-resistant. Check specifications carefully—some products marketed as “hybrid” are actually enhanced laminate with only water-resistant properties.
For wet areas like bathrooms, kitchens, and laundries, insist on 100% waterproof flooring. Read product warranties to understand what’s covered regarding water exposure.
The difference between waterproof and water-resistant matters significantly in Gold Coast’s humid climate and for rooms where water exposure is regular.
Matching Flooring to Lifestyle Needs
Busy households with children and pets benefit from hybrid flooring with thicker wear layers (20+ mils) and higher durability ratings. Commercial-grade residential hybrid offers maximum resilience.
For investment properties or rental homes, choose mid-range hybrid flooring that balances cost with durability. Tenants won’t maintain floors as carefully as owners, so durability matters more than premium aesthetics.
Quiet households without pets might prioritize aesthetic appeal over maximum durability ratings, allowing more focus on color and texture selection.
Considering Warranty and Manufacturer Recommendations
Quality hybrid flooring typically includes 15-30 year residential warranties covering manufacturing defects and sometimes wear-through of the protective layer.
Read warranty terms carefully to understand what’s required for warranty validity. Most require professional installation or strict adherence to installation guidelines for DIY installations.
Follow manufacturer recommendations for subfloor preparation, expansion gaps, and maintenance. These requirements exist for good reason and ignoring them can void your warranty.
Frequently Asked Questions (FAQs)
Is Hybrid Flooring Waterproof?
Yes, quality hybrid flooring is 100% waterproof throughout the entire plank construction. The Stone Plastic Composite or Wood Plastic Composite core won’t absorb moisture, swell, or warp like laminate or timber flooring.
This waterproof characteristic makes hybrid flooring suitable for bathrooms, kitchens, laundries, and any area where water exposure occurs. You can mop hybrid floors without concern and don’t need to panic if spills aren’t wiped up immediately.
However, waterproof flooring doesn’t mean you can ignore installation requirements. Proper expansion gaps and correct installation procedures remain important for long-term performance.
Can Hybrid Flooring Be Laid Over Tiles or Concrete?
Yes, hybrid flooring can be installed over existing tiles or concrete provided the surface is level, clean, and dry. The existing tiles or concrete must be firmly adhered and structurally sound.
For concrete subfloors, check moisture levels before installation. While hybrid flooring is waterproof, excessive subfloor moisture can cause other issues like mould growth or prevent transition strip adhesion.
When installing over tiles, ensure there are no loose or damaged tiles. High grout lines may require leveling compound to create a smooth surface. The total floor height increase (tiles plus hybrid flooring) should be considered, particularly at doorways.
Do You Need Underlay for Hybrid Flooring?
Many hybrid flooring products come with integrated underlay already attached to the bottom of each plank. If your chosen product includes attached underlay, no additional underlay is needed for most installations.
Separate underlay may be required if your hybrid flooring doesn’t include attached padding. Check the product specifications or ask your supplier.
Additional underlay might be beneficial for enhanced acoustic insulation in upper-floor installations or extra moisture protection over concrete slabs. However, never double-up underlay under hybrid flooring with integrated padding—this creates too much cushioning and prevents proper locking.
How Long Will Hybrid Flooring Last?
Quality hybrid flooring typically lasts 20-30 years in residential applications with proper care and maintenance. Commercial-grade products in lower-traffic residential settings can last even longer.
The wear layer thickness directly impacts longevity. Thicker wear layers (20+ mils) resist scratching and dulling longer than thinner layers. Premium products with 30-mil wear layers can maintain their appearance for decades.
Proper installation and maintenance significantly affect lifespan. Floors installed correctly over well-prepared subfloors with adequate expansion gaps will outlast poorly installed floors. Regular cleaning and avoiding abusive treatment extend hybrid flooring’s life.
Many manufacturers offer 15-30 year warranties on residential hybrid flooring, though warranties typically cover manufacturing defects and wear-through rather than scratches or damage from misuse.
Can I Install Hybrid Flooring Myself or Should I Hire Professionals?
DIY installation of hybrid flooring is definitely achievable for people with basic tool skills and attention to detail. The click-lock installation system is designed to be user-friendly, and many homeowners successfully complete installations themselves.
Benefits of DIY installation include cost savings (you only pay for materials, not labour) and the satisfaction of completing your own project. You can work at your own pace and don’t need to coordinate schedules with installers.
However, professional installation offers significant advantages. Experienced installers work faster, handle complex situations expertly, and provide warranty coverage on their work. For large areas, complex room layouts, or if you’re uncertain about your skills, professional installation often delivers better value despite the additional cost.
Consider your own capabilities honestly. If you’re comfortable following detailed instructions, have the necessary tools, and can dedicate adequate time to the project, DIY installation can work well. If you’re uncertain, have limited time, or want absolute confidence in the results, professional installation is worthwhile.
How Do I Clean and Maintain Hybrid Flooring?
Hybrid flooring requires minimal maintenance, making it ideal for busy households. Regular sweeping or vacuuming removes dirt and grit that could dull the surface over time.
For deeper cleaning, use a damp mop with plain water or a pH-neutral floor cleaner specifically designed for hybrid or luxury vinyl flooring. Avoid soaking wet mops—while the floor is waterproof, excessive water can seep into seams or under skirting.
Never use steam mops, harsh chemicals, abrasive scrubbers, or wax products on hybrid flooring. These can damage the protective wear layer or affect the floor’s appearance.
Wipe up spills promptly using a soft cloth. Place mats at entry doors to reduce tracked-in dirt. Use felt pads under furniture legs to prevent scratches when moving chairs or tables.
With these simple practices, hybrid flooring maintains its appearance and performance for decades with virtually no effort beyond basic cleaning.
Transform Your Gold Coast Home with Quality Hybrid Flooring from Award Carpets
Choosing the right flooring transforms how your home looks, feels, and functions every single day. Hybrid flooring offers the perfect combination of beauty, durability, and practicality for Gold Coast living—handling our coastal climate, busy lifestyles, and design aspirations without compromise.
Whether you’re renovating a single room or updating your entire home, the team at Award Carpets Gold Coast is here to help. With over 30 years of local experience, we understand what works in Gold Coast homes. We stock quality hybrid flooring options for every style preference and budget, and our professional installation services ensure your new floor performs beautifully for decades.
Visit our showroom to see our extensive hybrid flooring range in person, feel the textures, and discuss your project with our knowledgeable team. We offer free consultations and quotes, transparent pricing, and the lowest prices possible without cutting corners on quality or service.
From the first consultation through to the final cleanup, Award Carpets Gold Coast makes your flooring project simple and stress-free. Let us help you choose and install the perfect hybrid flooring for your home—because great floors make great homes.
Call us today or visit Award Carpets Gold Coast to explore your hybrid flooring options and receive your free quote. Your dream floor is closer than you think.