

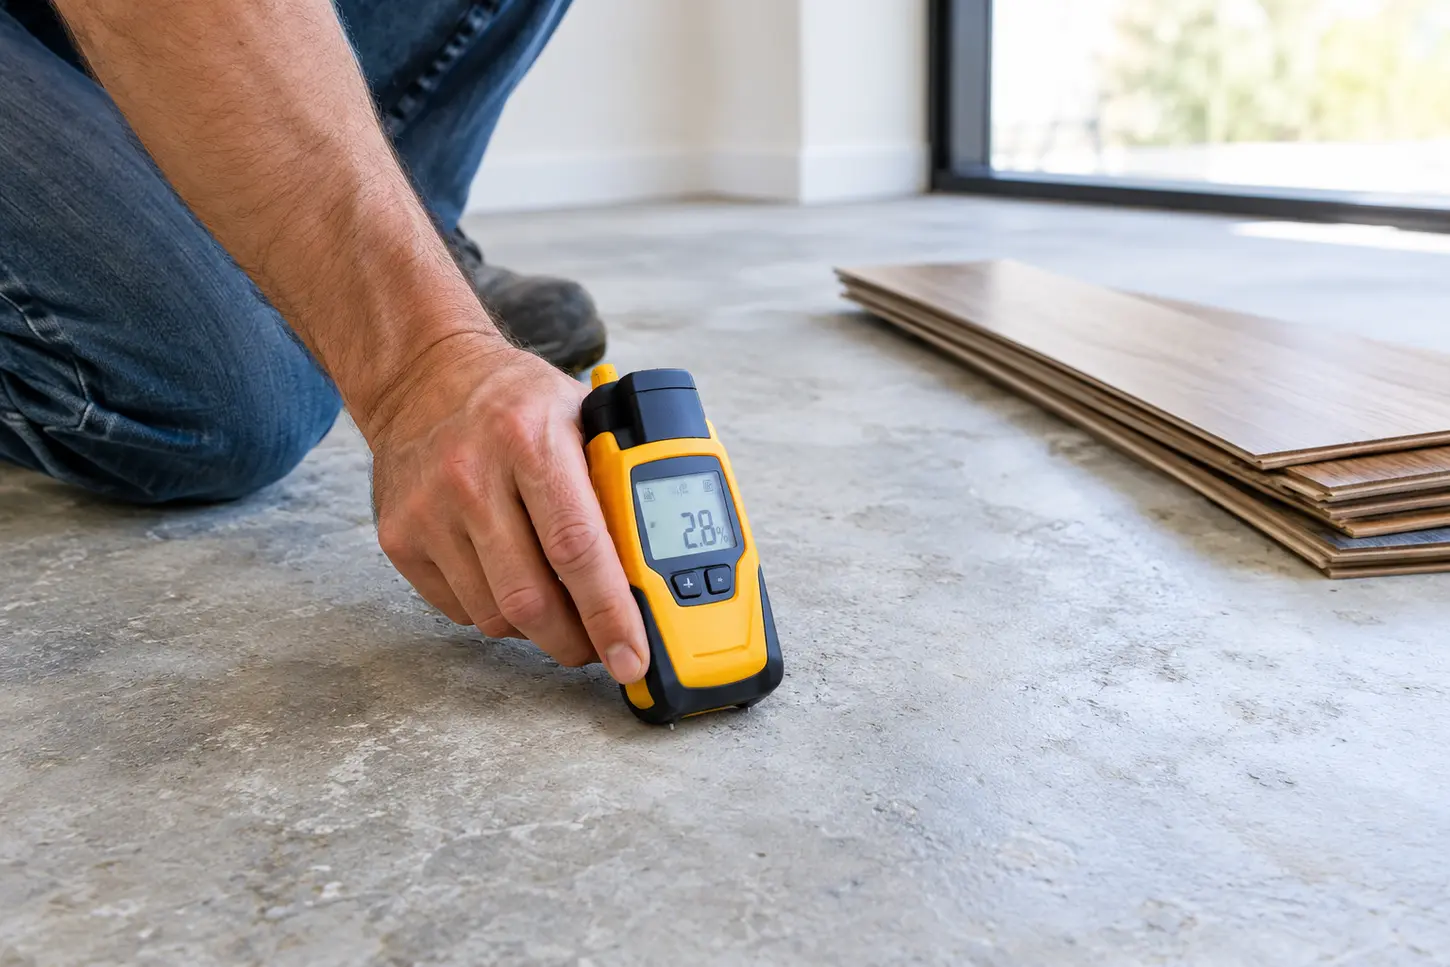

Installing laminate flooring over a concrete slab might seem straightforward, but skipping one critical step can lead to costly problems down the track. Before any laminate goes down, the concrete beneath it needs to be checked for moisture.
Concrete holds water far longer than it appears to on the surface. A slab that looks dry and feels firm underfoot can still contain enough moisture to cause laminate boards to swell, buckle, or develop mould beneath the surface over time. On the Gold Coast, where humidity is part of everyday life, this is not a risk worth taking lightly.
This guide walks through how to test concrete floors for moisture, what the results mean, and what to do if your slab isn’t ready for installation.
Why You Need to Test Concrete Floors for Moisture Before Installing Laminate
Concrete floor moisture testing is one of the most important steps in preparing a subfloor for laminate. It’s easy to overlook because the problem isn’t always visible — but the consequences of getting it wrong can be significant.
How Moisture in Concrete Can Affect Laminate Flooring
Laminate flooring is made from compressed wood-based materials with a photographic layer and protective wear layer on top. While quality laminate is designed to be durable, the core material is sensitive to moisture. When moisture rises from the concrete beneath, it can penetrate the laminate core, causing the boards to swell, cup, or separate at the joints.
Over time, moisture problems beneath flooring can also create conditions for mould growth and unpleasant odours. This happens beneath the flooring where it’s difficult to detect until the problem becomes serious.
What Happens When Laminate Flooring Is Installed Over a Damp Concrete Slab?
When laminate is laid over concrete that contains too much moisture, the boards absorb that moisture from below. The most common results include:
- Swelling and expansion of individual boards
- Lifting or gapping at the edges and ends
- Buckling or warping across the floor surface
- Adhesion failure if any adhesive was used during installation
- Mould and mildew forming beneath the floor
- A persistent damp or musty smell in the room
Once these problems develop, they’re difficult to reverse without lifting the entire floor. In many cases, the laminate itself cannot be reused.
Common Signs of Excess Moisture in Concrete Floors
Some moisture issues are visible before installation begins. Signs to look out for include:
- Dark or damp patches on the concrete surface
- White powdery deposits (efflorescence) on the slab
- A musty or stale smell in the room
- Visible staining from previous water damage
- Condensation forming on the slab surface, particularly in cooler conditions
That said, not all moisture problems show visible signs. Many slabs with elevated moisture levels look completely dry to the eye.
Why Concrete Floors Can Retain Moisture Even After They Look Dry
Concrete is a porous material that absorbs and holds water throughout its depth. When a slab looks dry on the surface, moisture can still be present deeper within the structure. This moisture migrates upward gradually — a process known as moisture vapour transmission.
This is why visual inspection alone is not sufficient. Surface dryness does not indicate what’s happening inside the slab or what moisture levels might be in the weeks and months after installation.
How Moisture Testing Helps Prevent Flooring Installation Problems
Testing gives you a clear picture of the moisture conditions in the concrete before flooring goes down. Rather than guessing, testing provides actual data — whether that’s a moisture reading from a meter, a result from a calcium chloride test, or a relative humidity measurement from inside the slab.
That data can then be compared against the laminate flooring manufacturer’s requirements to determine whether conditions are suitable for installation. If they’re not, the issue can be addressed before it causes damage.
Why New Concrete Slabs Need Time to Dry Before Laminate Installation
Freshly poured concrete contains a significant amount of water, which is necessary for the curing process. Even after concrete has reached its structural strength, it continues to release moisture for a long period. Depending on the thickness of the slab and environmental conditions, this drying process can take many months.
Installing laminate over concrete that hasn’t had enough time to dry is one of the most common laminate flooring installation mistakes made during new builds and renovations. Moisture testing before installation helps confirm whether the slab has dried sufficiently.
How to Tell If Your Concrete Floor Has a Moisture Problem
Before reaching for a testing kit, a careful visual inspection of the concrete can reveal early signs of moisture issues. This doesn’t replace testing, but it helps identify where to focus attention.
Look for Visible Signs of Dampness on the Concrete Surface
Walk the concrete floor slowly and look for areas that appear darker, shinier, or slightly wet compared to the surrounding surface. Moisture often rises unevenly through a slab, so one section might look fine while another shows clear signs of dampness.
Check for Dark Patches, Discolouration and Uneven Drying
Uneven colour across the slab — particularly darker patches that don’t correspond to shadows — can indicate areas of higher moisture content. This is especially noticeable shortly after the concrete has been swept or lightly washed.
Look for Efflorescence and White Mineral Deposits on Concrete
Efflorescence is the white or grey powdery residue that forms on concrete surfaces when moisture moves through the slab and deposits dissolved salts on the surface as it evaporates. It’s one of the clearest visible indicators that moisture is actively moving through the concrete.
Check for Musty Odours and Signs of Moisture Accumulation
A musty smell in a room with a concrete subfloor often indicates ongoing moisture activity. The odour can come from mould or mildew growing in areas with consistently elevated moisture, including beneath previously installed flooring or behind skirting boards.
Inspect for Previous Water Damage or Flooding
Staining, tide marks, or discolouration on walls near floor level can indicate that the area has been exposed to water at some point. Previous flooding — even years ago — can leave moisture-related issues that persist if the source was never fully addressed.
Identify Possible Moisture Sources Beneath the Concrete Slab
Think about what might be contributing to moisture in the slab. Is the property at a low point where water pools? Are there garden beds or irrigation systems close to the perimeter? Has there been any plumbing work beneath the slab? These factors all increase the likelihood of moisture issues.
Why a Concrete Floor That Looks Dry May Still Contain Moisture
The surface of concrete can dry out relatively quickly, especially in a well-ventilated or heated room. The deeper layers of the slab dry out far more slowly, and moisture stored lower in the slab continues to move upward over time. A slab that appears dry today may still be releasing moisture vapour at levels that would damage laminate flooring.
What Causes Moisture in Concrete Floors?
Understanding the source of moisture in a concrete slab helps determine whether testing alone is sufficient or whether a more comprehensive solution is needed.
Moisture Rising from the Ground Beneath the Concrete Slab
In many older homes and some newer builds, moisture from the soil beneath the slab naturally migrates upward through the concrete. This is known as rising damp or ground moisture vapour transmission and is one of the most common sources of moisture in concrete floors.
Missing or Damaged Damp-Proof Membranes
A damp-proof membrane (DPM) is a barrier — usually a heavy-duty plastic sheet — installed beneath the concrete slab during construction to prevent ground moisture from rising into the floor. If no DPM was installed, or if it has been damaged, moisture can move freely from the ground into the slab.
Groundwater and Poor Drainage Around the Property
Properties in low-lying areas, or where drainage around the building perimeter is inadequate, are more prone to moisture in concrete floors. Saturated ground surrounding the slab can keep moisture levels elevated within the concrete indefinitely.
Plumbing Leaks Beneath or Around the Concrete Floor
A slow plumbing leak beneath or near the slab can introduce moisture into the concrete over time. These leaks are often difficult to detect without investigation and may not produce visible surface dampness until the problem is well established.
Water Entering Through Cracks in the Concrete
Cracks in a concrete slab — whether from settling, shrinkage, or impact — can allow water to enter from below or from the sides. Even fine hairline cracks can provide a pathway for moisture under certain conditions.
Moisture Retained in Newly Poured Concrete
As mentioned, concrete retains a significant quantity of water during and after the curing process. The thicker the slab, the longer it takes for this moisture to evaporate. A slab that was poured months ago may still contain elevated moisture levels depending on conditions during and after curing.
High Humidity and Condensation Inside the Property
In humid climates like the Gold Coast, warm moist air can condense on cooler concrete surfaces — particularly in enclosed spaces with limited airflow. This condensation can add to the moisture present on and near the slab surface.
Previous Flooding, Water Damage and Inadequate Waterproofing
A property that has experienced flooding or significant water ingress in the past may still have elevated moisture in the concrete, particularly if the source was not fully remedied. Poor or absent waterproofing in wet areas adjacent to the concrete floor can also contribute.
What You Need to Test Concrete Floors for Moisture
The right equipment depends on the testing method being used. Here’s what’s typically required for the most common approaches to concrete floor moisture testing.
Plastic Sheet for a Basic DIY Moisture Screening Test
A standard 200-micron polyethylene sheet (often referred to as builder’s plastic) is the primary material for the plastic sheet moisture test. The sheet needs to be large enough to cover a reasonable area of the concrete — a piece of roughly 600 x 600 mm is commonly used.
Duct Tape or Suitable Sealing Tape
To make the plastic sheet test effective, all four edges need to be sealed firmly to the concrete. Duct tape or a similar heavy-duty adhesive tape works well for this purpose, though the tape needs to create an airtight seal on a clean concrete surface.
Concrete Moisture Meter for Surface Moisture Readings
A concrete moisture meter is a handheld electronic device that provides rapid moisture readings from the surface of the slab. Some models use pin electrodes that are pressed into the concrete, while others use non-invasive radio frequency technology to read moisture without making contact. For concrete testing, a meter that is specifically rated or calibrated for concrete is preferable.
Calcium Chloride Test Kit for Measuring Moisture Emission
A calcium chloride test kit is a sealed container holding a small amount of calcium chloride, which absorbs moisture vapour from the concrete surface over a set period. The kit measures the rate at which moisture is being emitted from the slab and is typically expressed in grams per square metre per 24 hours.
Relative Humidity Testing Equipment for Concrete Slabs
In-situ relative humidity testing involves drilling holes into the concrete and inserting calibrated RH sensors or probes. This provides a reading of moisture conditions within the slab rather than just at the surface. RH testing equipment includes the probes, a calibrated reader, and the drilling tools required to prepare the test holes.
Cleaning Supplies for Preparing the Concrete Surface
Most moisture testing methods require a clean, dry surface to produce accurate results. Basic cleaning supplies — a broom, vacuum, and clean cloth — are needed to remove dust, debris, and any surface contaminants that could affect test accuracy.
Protective Equipment and Other Testing Essentials
When working with concrete dust or drilling into slabs, appropriate personal protective equipment including a dust mask, safety glasses, and gloves is advisable. A pencil or marker and notepad (or phone) for recording test locations and readings is also useful.
Choosing the Right Moisture Testing Method for Your Concrete Floor
No single method covers every situation. The plastic sheet test is accessible for basic screening but has limitations. A moisture meter gives quick surface readings but doesn’t measure conditions inside the slab. Calcium chloride and in-situ RH testing provide more detailed information but require more preparation and, in the case of RH testing, specialised equipment.
For a residential installation, starting with a visual inspection, plastic sheet test, and moisture meter reading is a reasonable approach. If there is any indication of elevated moisture, or if the flooring manufacturer’s installation requirements call for specific testing, more precise methods should be considered.
How to Test Concrete Floors for Moisture Using the Plastic Sheet Method
The plastic sheet moisture test — sometimes called the polythene sheet test — is the most accessible starting point for DIY concrete moisture testing. It doesn’t require any special equipment beyond a piece of plastic sheet and some tape.
What Is the Plastic Sheet Moisture Test?
The plastic sheet test works by trapping moisture vapour beneath a sealed sheet of plastic on the concrete surface. Any moisture rising from the slab accumulates under the sheet during the test period, and the results are assessed by checking for condensation or darkened concrete beneath the plastic.
This test provides a general indication of surface moisture activity but does not give a precise moisture reading. It is best used as a screening tool rather than a definitive assessment.
Step 1 – Choose a Suitable Area of the Concrete Floor
Select a representative area of the concrete floor. If the entire room is being tested, consider placing test sheets in multiple locations — near walls, in the centre of the room, and in any areas where moisture is suspected. Avoid areas with visible cracks, drains, or previous water damage for your initial test placement, as these will be tested separately.
Step 2 – Clean and Prepare the Concrete Surface
Sweep or vacuum the concrete thoroughly to remove any dust, dirt, or loose material. Wipe the surface with a clean, dry cloth if needed. The tape will only adhere properly to a clean surface, and contaminants on the concrete can affect how accurately the test reflects actual moisture conditions.
Allow the area to dry completely if it has been cleaned with any liquid before applying the tape and sheet.
Step 3 – Cut a Plastic Sheet to Cover the Testing Area
Cut a section of polyethylene sheet to approximately 600 x 600 mm or a similar convenient size. The sheet needs to be large enough to cover a meaningful area of concrete while still allowing all four edges to be sealed effectively.
Step 4 – Seal All Four Edges of the Plastic Sheet
Apply tape firmly along all four edges of the plastic sheet, pressing it down evenly onto the concrete surface. The goal is to prevent any air exchange beneath the sheet. Pay particular attention to the corners, as these are the most likely points for the seal to be incomplete.
If the concrete surface is dusty or difficult to tape, lightly dampening and drying the area first may help the tape adhere more securely.
Step 5 – Leave the Plastic Sheet in Place for 24 to 48 Hours
Leave the sealed sheet undisturbed for a minimum of 24 hours. Some guidelines suggest 48 to 72 hours for more reliable results. During this period, avoid walking over the sheet or disturbing the sealed edges.
The room should be kept in its normal use conditions during the test — doors and windows at their usual state, climate control operating as it typically would.
Step 6 – Check for Condensation Beneath the Plastic
After the test period, carefully peel back one corner of the plastic sheet without disturbing the rest and check the underside of the sheet for any visible moisture droplets or condensation.
Step 7 – Look for Darkened Concrete Underneath the Sheet
After removing the sheet completely, inspect the concrete beneath it. If the concrete appears darker than the surrounding areas or shows any visible dampness on the surface, this indicates that moisture has been rising from the slab.
Step 8 – Compare the Test Area with the Surrounding Concrete
The difference in colour and condition between the tested area and the surrounding concrete provides a useful point of comparison. A significant contrast suggests meaningful moisture activity beneath the sheet.
What Condensation Under the Plastic Sheet Could Mean
Condensation on the underside of the plastic — or visible moisture on the concrete beneath it — indicates that moisture vapour is present and active in the slab. This does not confirm a specific moisture level, but it does suggest that further testing with a moisture meter or more precise method is advisable before proceeding with laminate installation.
What It Means If the Plastic Sheet Appears Completely Dry
If the plastic sheet is completely dry after 48 hours and there is no change in the appearance of the concrete beneath it, this is a positive indicator. However, a dry result from the plastic sheet test alone should not be taken as confirmation that the slab is ready for laminate. It simply means that no obvious surface moisture activity was detected.
Limitations of the Plastic Sheet Moisture Test
The plastic sheet test is a screening method, not a precise measurement. It doesn’t provide a moisture reading that can be compared to a manufacturer’s specification. It can also be influenced by temperature differences between the concrete and the air above it, which can cause condensation to form independent of slab moisture. Some flooring manufacturers do not accept the plastic sheet test as sufficient evidence of slab readiness.
Can the Plastic Sheet Test Confirm That a Concrete Floor Is Ready for Laminate?
Not on its own. The plastic sheet test is best understood as a preliminary check. If the result is clearly positive (condensation or darkened concrete), it’s a reliable signal that moisture testing with a more precise method is needed. A dry result under the sheet is encouraging but should be followed up with moisture meter readings and, where warranted, calcium chloride or RH testing.
How to Use a Concrete Moisture Meter Before Installing Laminate
A concrete moisture meter provides a faster and more quantifiable result than the plastic sheet test. While it still has limitations, it’s a practical tool for gaining a quick picture of surface moisture conditions across the slab.
What Is a Concrete Moisture Meter?
A concrete moisture meter is an electronic handheld device designed to detect and measure moisture levels at or near the surface of concrete. Readings are typically displayed as a percentage or on a relative scale, depending on the model.
How Concrete Moisture Meters Work
There are two main types of concrete moisture meters:
Pin-type meters use two or more metal probes that are pressed into or against the concrete. An electrical current passes between the pins, and the resistance offered by the concrete — which varies with moisture content — is used to calculate a moisture reading.
Non-invasive (pinless) meters use radio frequency or electromagnetic pulses to detect moisture beneath the surface without physical contact. These are useful for surveying larger areas quickly.
Both types measure moisture at or near the surface only — not throughout the full depth of the slab.
Choosing a Moisture Meter Suitable for Concrete Floors
Not all moisture meters are calibrated for concrete. Some models are designed primarily for timber and may give unreliable readings on concrete. Look for a meter that specifically lists concrete as a material it can be used on, and check that it provides readings in a format that can be meaningfully interpreted (ideally a percentage or a reference scale relevant to concrete).
Step 1 – Check the Moisture Meter’s Instructions
Before taking any readings, read the manufacturer’s instructions for your specific meter. Understand how to interpret the scale or percentage it provides, and check whether any calibration steps are required before use.
Step 2 – Prepare the Concrete Surface for Testing
Ensure the concrete surface is clean and free from dust, debris, sealants, or coatings that could affect the readings. Surface coatings in particular can interfere with pin-type meters and may cause false readings.
Step 3 – Take Readings at Multiple Locations
Don’t rely on a single reading. Take moisture measurements at several points across the floor — particularly in areas that might be prone to moisture, such as near external walls, at low points in the floor, and in rooms below ground level.
Step 4 – Check Moisture Levels Around Walls and Corners
Corners and wall junctions are common areas for moisture accumulation in concrete. Water that enters at the perimeter tends to spread inward, so testing along the edges of the slab is particularly important.
Step 5 – Test Areas Near Plumbing and Previous Water Damage
Any areas near plumbing runs, floor wastes, or locations of previous water damage should be tested separately. These are high-risk zones and may show elevated readings even when the broader floor area appears to be within acceptable limits.
Step 6 – Record and Compare the Moisture Readings
Write down the readings from each test location, including the approximate position on the floor. This record is useful for identifying patterns — for example, elevated readings concentrated along one wall — and for comparison if retesting is needed later.
How to Interpret Concrete Moisture Meter Readings
Interpretation depends entirely on the scale used by the specific meter. Some meters provide a percentage figure; others use a comparative scale where certain ranges indicate acceptable or elevated moisture. The key is to understand what the specific reading means for your device and then compare that against the requirements stated in the laminate flooring manufacturer’s installation guide.
A reading that might be acceptable for one laminate product could be outside the acceptable range for another. Always check the manufacturer’s specifications.
Can a Concrete Moisture Meter Measure Moisture Inside the Slab?
Standard surface moisture meters are limited to the top portion of the concrete. Moisture deeper in the slab — which is often where the greater volume of water is stored — is not captured by surface readings alone. For a more complete picture of moisture conditions in the full depth of the slab, in-situ relative humidity testing is more appropriate.
Understanding the Limitations of Surface Moisture Meters
Surface moisture meters are useful screening tools, but they have real limitations:
- They only measure moisture at or near the surface
- Surface coatings, sealants, and dust can affect readings
- Temperature differences between the slab and the air can cause condensation that influences results
- Different meters use different scales, making direct comparison difficult without understanding the specific calibration
How to Perform a Calcium Chloride Moisture Test on Concrete
The calcium chloride moisture test is a more precise method of measuring moisture emission from a concrete slab. It is widely used in the flooring industry and is referenced in many flooring manufacturers’ installation documentation.
What Is the Calcium Chloride Moisture Test?
The calcium chloride test measures the rate at which moisture vapour is emitted from the concrete surface over a defined period. A small amount of anhydrous calcium chloride is placed in a sealed container on the concrete, and the weight gain of the calcium chloride — caused by moisture absorption — is used to calculate a moisture emission rate (MVER).
How the Calcium Chloride Test Measures Moisture Emission
Because calcium chloride is hygroscopic (it readily absorbs moisture from the air), the amount of moisture it absorbs during the sealed test period reflects how much vapour is being emitted from the concrete beneath. The result is expressed in grams per square metre per 24 hours (g/m²/24h) or, in some references, as pounds per 1,000 square feet per 24 hours.
When to Consider a Calcium Chloride Test
Calcium chloride testing is worth considering in the following situations:
- The laminate flooring manufacturer requires a moisture emission rate test before installation
- Visual inspection, plastic sheet testing, or moisture meter readings have indicated possible elevated moisture
- The property has a history of moisture problems or water damage
- The slab is newly poured and its dryness is uncertain
Step 1 – Prepare the Concrete Testing Area
The concrete surface for the test area must be clean, flat, and free from any coatings, sealants, curing compounds, or residues. Any existing flooring, adhesive, or coating within the test area should be fully removed, as these will prevent accurate measurement of moisture vapour emitting from the concrete itself.
The test area should not be cleaned with water within 24 hours before testing.
Step 2 – Set Up the Calcium Chloride Test Kit
Open the sealed calcium chloride container (following the manufacturer’s instructions carefully to avoid moisture absorption before the test begins), place it in the centre of the prepared test area, and immediately cover it with the provided dome or cover. Seal the perimeter of the dome to the concrete using the tape provided in the kit.
Record the starting weight of the calcium chloride if your kit requires it, along with the test start time and the test area surface size.
Step 3 – Allow the Test to Run for the Required Period
Most calcium chloride tests run for 60 to 72 hours. The room should be maintained at its normal temperature and humidity conditions throughout the test period. Avoid exposing the test area to direct sunlight, drafts, or HVAC airflow.
Step 4 – Measure the Moisture Emission Rate
At the end of the test period, carefully remove the dome and re-seal the calcium chloride container immediately to prevent continued moisture absorption. Weigh the calcium chloride and calculate the weight gain.
Using the surface area of the test and the duration, calculate the moisture emission rate in g/m²/24h according to the formula provided in the test kit instructions.
Understanding Moisture Emission Results
The calculated result is compared against the moisture emission threshold specified by the laminate flooring manufacturer. Different products have different tolerances — some permit higher emission rates when a moisture barrier system is used; others require a specific emission rate regardless.
A higher result means more moisture is being emitted from the slab, which increases the risk to moisture-sensitive flooring if left unaddressed.
What Are the Limitations of Calcium Chloride Testing?
Calcium chloride testing measures moisture at the surface of the slab only and does not capture conditions deeper within the concrete. It is sensitive to ambient temperature and humidity, and results can be affected if test conditions vary significantly from normal. It is generally most useful when used alongside other testing methods for a more complete assessment.
Why Testing Requirements Depend on the Flooring Manufacturer
Different laminate flooring products have different tolerances for moisture. The testing thresholds and accepted methods vary between manufacturers and should always be confirmed in the product’s installation guide before proceeding.
How to Measure Relative Humidity Inside a Concrete Slab
In-situ relative humidity (RH) testing is considered the most reliable method for measuring moisture conditions within a concrete slab. Unlike surface tests, it captures moisture levels from within the concrete structure.
What Is In-Situ Relative Humidity Testing?
In-situ RH testing involves drilling holes to a defined depth within the concrete slab and inserting calibrated relative humidity sensors or probes. Once the probes have been given time to acclimatise to conditions within the slab, they provide a reading of the RH percentage at that depth.
How Relative Humidity Testing Differs from Surface Moisture Testing
Surface methods — whether a moisture meter, plastic sheet, or calcium chloride test — measure conditions at or immediately above the concrete surface. In-situ RH testing measures the moisture environment within the slab itself. This is significant because moisture inside the concrete is what ultimately migrates to the surface and affects flooring above it.
Why Moisture Inside the Concrete Slab Matters
A slab can have a relatively dry surface while retaining significant moisture at depth. Over time, that deeper moisture continues to move toward the surface and will eventually affect flooring installed above. Testing inside the slab provides advance information about moisture that may not yet be visible at the surface.
How Relative Humidity Sensors Are Installed in Concrete
The process involves drilling holes into the concrete at a depth that is typically 40 per cent of the slab’s total thickness for a slab drying from one side (or 20 per cent for a slab drying from both sides). Calibrated RH sensors or sleeves are inserted into the holes and sealed to ensure accurate readings that reflect conditions within the slab rather than the ambient air.
How Long Concrete Moisture Sensors Need to Stabilise
After insertion, the sensors need time to equilibrate to the moisture conditions inside the concrete. This typically takes a minimum of 72 hours, though some references suggest waiting up to seven days for the most accurate results, particularly in thick or dense slabs.
Understanding Relative Humidity Readings in Concrete
Results are expressed as a percentage of relative humidity within the slab. Laminate flooring manufacturers typically specify a maximum RH reading that the concrete must not exceed before installation. This figure varies by product, so always check the manufacturer’s installation guide.
A reading of 75 per cent RH is a threshold that appears in some flooring standards as a general guide, but this should not be treated as universal — always refer to the specific product documentation.
When Professional In-Situ Relative Humidity Testing May Be Necessary
RH testing requires calibrated equipment and knowledge of how to install and read sensors correctly. For most residential laminate installations, a combination of visual inspection, plastic sheet testing, and a moisture meter is a practical starting point. In-situ RH testing becomes more relevant when:
- Moisture levels from surface testing are borderline or uncertain
- The flooring manufacturer’s requirements specify RH testing
- The property has a history of moisture issues
- A commercial or higher-value installation justifies more thorough testing
Why Relative Humidity Testing Can Provide More Detailed Moisture Information
Because it captures moisture conditions throughout the depth of the slab rather than just at the surface, in-situ RH testing tends to be the most complete picture available to someone assessing a concrete subfloor before flooring installation. Surface tests tell you about current surface conditions; RH testing tells you more about the moisture environment the flooring will be living in after installation.
What Moisture Level Is Acceptable for Installing Laminate Flooring?
There is no single moisture level that applies to every laminate flooring product. Acceptable limits are set by individual manufacturers and depend on the specific product, the testing method used, and whether a moisture barrier is being installed.
Understanding Concrete Moisture Levels Before Flooring Installation
Concrete naturally contains some residual moisture — the question for laminate installation is whether that moisture is at a level the flooring can tolerate without deteriorating. This threshold varies between products and is determined by the materials and construction of the laminate itself.
Why There Is No Single Moisture Limit for Every Laminate Flooring Product
Laminate products differ in their core material, density, surface treatment, and moisture resistance. A product with a moisture-resistant HDF core tolerates different conditions than one with a standard core. Underlay and moisture barrier systems also affect the effective tolerance of the installed floor. For these reasons, there is no one-size-fits-all moisture limit.
Check the Laminate Flooring Manufacturer’s Moisture Requirements
The most important step in determining acceptable moisture levels is reading the installation documentation supplied with the specific laminate product being installed. This documentation will specify:
- The maximum acceptable moisture reading or emission rate
- The testing method or methods considered acceptable
- Whether a moisture barrier is required and what type is recommended
Never assume a figure applies across all products — always check the paperwork for the specific floor being installed.
Understanding Relative Humidity Limits for Concrete Subfloors
For in-situ RH testing, many laminate manufacturers specify a maximum RH level within the concrete slab. This varies by product but is often in the range of 75 to 80 per cent, with some products permitting higher levels when a moisture barrier is used.
Again, these figures are illustrative — always refer to the specific product documentation.
Understanding Moisture Emission Limits for Concrete Slabs
For calcium chloride testing, results are expressed in grams per square metre per 24 hours. Manufacturers typically set a threshold that must not be exceeded for standard installation, with some products permitting higher emission rates when a vapour barrier system approved by the manufacturer is installed.
How Underlay and Moisture Barriers Affect Installation Requirements
Many laminate products are supplied with or require a specific underlay, and some underlays include a built-in moisture barrier. Where this is the case, the manufacturer may permit installation on slabs with slightly higher moisture levels than would otherwise be acceptable. However, moisture barriers and underlay are not a universal fix for excessive concrete moisture — they have their own performance limits, and they don’t address the underlying cause of the moisture.
Why Concrete Moisture Readings Must Match the Testing Method
A moisture reading is only meaningful if it comes from a testing method that is compatible with the manufacturer’s specifications. A result from a moisture meter cannot necessarily be compared to a threshold expressed as an RH percentage, and a calcium chloride result cannot be substituted for an RH reading without understanding the relationship between the two. Use the testing method the manufacturer specifies, or at minimum understand how the method you used relates to the manufacturer’s requirements.
What to Do If Your Concrete Floor Exceeds the Recommended Moisture Limit
If testing shows that moisture levels are above the threshold for the product being installed, the installation should not proceed until either the moisture levels have been reduced to within acceptable limits, or an appropriate moisture mitigation system has been installed in accordance with the manufacturer’s instructions. Covering a damp slab without addressing the issue is likely to result in flooring failure.
Why You Should Not Rely on a General Moisture Percentage for Every Concrete Slab
Rules of thumb circulate widely in the building and flooring industry — but they are generalisations. A figure that may be appropriate for one product, testing method, or type of laminate may not apply to another. The safest approach is always to follow the instructions for the specific product being installed.
How Long Should Concrete Floors Dry Before Installing Laminate?
Concrete drying time is often underestimated. The curing process that gives concrete its structural strength happens relatively quickly — the drying process that removes excess moisture takes far longer.
How Long Does New Concrete Take to Dry?
As a rough guide, concrete takes approximately one month of drying time per 25 mm of slab thickness under ideal conditions. A standard 100 mm residential slab could therefore need four or more months to dry sufficiently for moisture-sensitive flooring — and this estimate assumes favourable temperature, humidity, and ventilation conditions throughout.
This is a general estimate only. Actual drying time varies significantly, which is why moisture testing rather than elapsed time is the reliable measure of readiness.
Why Concrete Curing and Concrete Drying Are Different Processes
Curing refers to the chemical process by which concrete reaches its designed compressive strength. This happens over approximately 28 days. Drying refers to the evaporation of excess water that was added during mixing and that remains in the slab after curing is complete. These are separate processes — a fully cured concrete slab can still contain significant moisture.
How Concrete Thickness Affects Drying Time
Thicker slabs contain more water and have a longer path for that moisture to travel to the surface and evaporate. Drying time increases disproportionately with slab thickness — a slab twice as thick does not simply take twice as long to dry.
How Temperature and Humidity Affect Concrete Drying
Warmer temperatures and lower relative humidity accelerate the drying of concrete by increasing the rate of evaporation. Cooler conditions and high humidity slow it down considerably. On the Gold Coast, summer humidity can significantly extend the effective drying time of concrete slabs.
How Poor Ventilation Can Slow Concrete Drying
A space with limited air movement retains the moisture that evaporates from the concrete, reducing the rate at which further evaporation can take place. Good ventilation — whether natural or mechanical — significantly speeds up concrete drying.
Why Concrete Can Take Longer to Dry in Humid Conditions
In humid conditions, the moisture content of the air surrounding the slab is already elevated. This reduces the gradient that drives moisture out of the concrete, slowing the drying process considerably. This is a practical concern for the Gold Coast, where high humidity is common, particularly during summer.
Can You Install Laminate Flooring on a Newly Poured Concrete Slab?
Not without moisture testing confirming that moisture levels are within acceptable limits. Even if the surface appears dry and the concrete has had several months to dry, testing is the only way to confirm that conditions are suitable for laminate installation.
Why Moisture Testing Is More Reliable Than Guessing the Drying Time
Elapsed time gives you an estimate — moisture testing gives you evidence. Two slabs of the same thickness poured in the same area can dry at different rates depending on the drainage beneath them, the humidity conditions during drying, the quality of the concrete mix, and other factors. Testing removes the guesswork.
What to Do If Your Concrete Floor Fails a Moisture Test
A failed moisture test is not the end of the project — it’s the signal to investigate further and take appropriate steps before proceeding.
Identify the Source of the Excess Moisture
The first step after a failed moisture test is to understand where the moisture is coming from. Rising damp, a damaged DPM, plumbing leaks, groundwater infiltration, and condensation from humidity each require different responses. Treating the wrong cause will not resolve the problem.
Check for Plumbing Leaks and Water Ingress
Arrange for a plumber to assess whether there are any active leaks in the pipework beneath or near the slab. Even small, slow leaks can keep concrete moisture levels elevated indefinitely if left unaddressed.
Improve Ventilation and Air Circulation Where Appropriate
In enclosed spaces where humidity or condensation is contributing to elevated moisture readings, improving ventilation can help. This might mean opening windows and doors more frequently, installing an extraction fan, or running a dehumidifier during the drying period.
Allow the Concrete Slab More Time to Dry
If the slab is newly poured and the moisture is simply residual construction water, the most appropriate course of action may be to allow more time for drying before retesting. Improving ventilation and warmth will assist this process.
Consider Whether a Damp-Proof Membrane Is Missing or Damaged
If rising damp is the likely cause, investigating the condition of any existing DPM — or whether one was installed at all — is an important step. If the DPM is absent or damaged, a surface-applied moisture mitigation system may be required as part of the solution.
Investigate Ground Moisture and Drainage Problems
If ground saturation is contributing to the problem, improving drainage around the property perimeter can reduce moisture ingress over time. This may involve improving landscaping grading, installing agricultural drainage, or redirecting downpipes and irrigation away from the building.
Use a Compatible Moisture Mitigation System Where Required
In cases where moisture levels are elevated but not extreme, a moisture mitigation system — such as a surface-applied epoxy or polyurethane coating — can be used to reduce moisture vapour transmission to levels acceptable for flooring installation. These systems must be applied in accordance with the product instructions and must be compatible with the laminate flooring and its required adhesion system.
Retest the Concrete After Addressing the Moisture Problem
After any remediation or extended drying period, retest the concrete before proceeding. Do not assume that because time has passed or work has been done, the problem is resolved. Testing confirms whether the slab is now within acceptable limits.
When to Contact a Flooring Professional or Waterproofing Specialist
Some moisture problems are beyond what can be addressed through standard flooring preparation. If the source of moisture cannot be identified, if moisture levels remain elevated after reasonable attempts at remediation, or if the problem appears to be related to structural waterproofing, a professional assessment by a waterproofing specialist is worth seeking out before proceeding with flooring installation. A professional flooring installer can also advise on whether the conditions are suitable for the specific laminate product in question.
Do You Need to Waterproof a Concrete Floor Before Installing Laminate?
The terms waterproofing and moisture protection are sometimes used interchangeably, but in the context of laminate flooring on concrete, they mean different things.
Understanding the Difference Between Waterproofing and Moisture Protection
Waterproofing refers to preventing liquid water from entering or moving through a structure. In flooring contexts, it typically refers to measures that stop water from penetrating through a floor surface — for example, in a bathroom or wet area.
Moisture protection refers to limiting the amount of moisture vapour that can move between the concrete slab and the flooring above. This is the primary concern for laminate on concrete in dry areas.
The two approaches overlap in some applications, but a moisture barrier used beneath laminate in a living area is not the same as a fully waterproofed floor membrane used in a wet area.
Does Laminate Flooring Need a Moisture Barrier on Concrete?
In many cases, yes. Because concrete is porous and laminate is susceptible to moisture damage, some form of moisture protection between the two is generally recommended or required. Whether this is a standalone sheet, a combined underlay and barrier, or a surface-applied treatment depends on the product and the specific conditions of the installation.
Using builder’s plastic as a subfloor moisture barrier is a common and practical approach for residential laminate installations over concrete.
What Is a Damp-Proof Membrane?
A damp-proof membrane (DPM) is a barrier — typically a polyethylene sheet or a liquid-applied coating — designed to prevent moisture from passing from the concrete into the flooring above. In new construction, a DPM is normally installed beneath the concrete slab. In retrofits and renovations, a DPM or moisture barrier is installed over the existing slab before the flooring underlay and boards.
How Moisture Barriers Help Protect Laminate Flooring
A moisture barrier placed between the concrete and the laminate reduces the amount of moisture vapour that reaches the underside of the boards. This doesn’t eliminate moisture from the slab — it limits its effect on the flooring. For this reason, moisture barriers are a protective measure for slabs with acceptable moisture levels, not a solution for slabs with significant moisture problems.
When a Moisture Barrier May Be Required Under Laminate
A moisture barrier is typically required or recommended when:
- The laminate product is being installed over concrete
- The concrete slab is below or at ground level (e.g., slab-on-ground construction)
- The manufacturer’s installation instructions specify a barrier
- Moisture testing indicates moisture levels that are within acceptable limits but not negligible
Can You Install a Moisture Barrier Over an Existing Concrete Slab?
Yes. A polyethylene sheet moisture barrier can be laid directly on an existing concrete slab before the laminate underlay and boards are installed. The sheets should be overlapped at the joins and taped securely, with the edges turned up and trimmed at the wall line.
Liquid-applied DPMs can also be applied over an existing slab and are useful where the concrete surface is uneven or where a seamless barrier is needed.
Choosing a Moisture Barrier Compatible with Laminate Flooring
When selecting a moisture barrier, check that it is compatible with the specific laminate product and its required underlay. Some laminate products specify the type of barrier to be used, or are sold with an integrated underlay that includes moisture protection. Using a barrier that is not compatible with the product may affect the installation in ways that could void the manufacturer’s warranty.
Why Some Concrete Moisture Problems Require More Than an Underlay
Moisture barrier underlays are rated for use at specific moisture levels. If the slab has moisture levels above the threshold for standard moisture barriers, a more robust moisture mitigation system — such as a surface-applied epoxy coating — may be required before the underlay and flooring can be installed.
Underlay is not designed to manage severe or ongoing moisture problems. Addressing the source of the moisture is always preferable to trying to contain it with underlay alone.
When Concrete Waterproofing Should Be Completed Before Flooring Installation
If laminate is being installed in an area adjacent to a wet area — such as near a bathroom or laundry — ensuring that any waterproofing in those adjacent spaces has been properly completed is an important step before installation begins. Waterproofing failures in adjoining rooms can introduce water to the concrete beneath the laminate floor, causing damage that may not be immediately visible.
How to Prepare a Concrete Floor for Laminate Flooring Installation
Once moisture testing confirms that conditions are acceptable, the concrete surface itself needs to be prepared before laminate installation can begin. Good concrete subfloor preparation makes a direct difference to the quality and longevity of the finished floor.
Remove Dust, Dirt and Debris from the Concrete Surface
Sweep the entire floor and vacuum thoroughly to remove all loose material. Dust and debris trapped beneath the underlay can cause uneven support and in some cases can be felt or heard underfoot after installation.
Check the Concrete Floor for Cracks and Surface Damage
Walk the entire surface of the concrete and inspect it for cracks, holes, spalling, or areas of surface deterioration. Note the location and approximate size of any defects. Fine shrinkage cracks that are stable and do not show movement generally don’t require repair for laminate installation, but wider cracks or areas of damaged concrete should be addressed.
Repair Suitable Concrete Cracks Before Installing Laminate
Suitable cracks and surface defects can be filled with an appropriate concrete patching or levelling compound. Follow the product instructions and allow repairs to cure and dry fully before proceeding. Not all concrete crack repairs are the same — if cracks appear to be structural or related to ongoing movement, seek professional advice before attempting repair.
Check the Concrete Floor for Uneven Areas
Laminate flooring requires a reasonably flat and level subfloor for proper installation. Check the floor with a long straight edge — typically 1.8 m or 3 m — and note any high or low spots. Most laminate manufacturers specify a maximum variation in flatness, commonly around 3 mm over a 1.8 m span, though this varies by product.
Ensure the Concrete Subfloor Meets Flatness Requirements
High spots can be ground or abraded down; low spots can be filled with a suitable self-levelling or floor levelling compound. Following the concrete subfloor flatness requirements of the specific laminate product protects against issues such as joint peaking, movement, and an uneven feel underfoot.
Allow Repairs and Surface Treatments to Dry Properly
Any compounds, levelling products, or moisture mitigation treatments applied to the concrete must be fully dried and cured before the underlay and laminate are installed. Check the product specifications for drying and curing times and observe them in full.
Confirm the Concrete Moisture Levels Are Within the Required Limits
After surface preparation has been completed and any treatments have dried, it is good practice to recheck moisture levels before beginning installation — particularly if some time has passed since the initial test. Conditions can change, especially if repair compounds introduced additional water to the slab.
Install the Correct Underlay and Moisture Protection
Select an underlay that is compatible with the laminate product and appropriate for the conditions of the installation, including whether a moisture barrier is required and whether additional acoustic or thermal properties are needed. Install the underlay in accordance with the manufacturer’s instructions before laying the laminate.
Follow the Laminate Flooring Manufacturer’s Installation Instructions
Each laminate product has its own installation requirements. Read these thoroughly before beginning and follow them throughout. This includes requirements for acclimatisation of the boards, installation patterns, expansion gaps, fastening methods, and any restrictions on where the product can be installed.
A good laminate flooring installation guide walks through these steps in practical detail and is worth reviewing before starting the installation.
Common Mistakes to Avoid When Testing Concrete Floors for Moisture
These are among the most common errors made when testing concrete floors for moisture and preparing them for laminate installation.
Assuming a Dry-Looking Concrete Floor Is Ready for Laminate
A concrete floor that looks dry is not necessarily ready for laminate. Surface dryness does not reflect conditions within the slab. Testing — not visual assessment — is how you confirm readiness.
Relying Only on the Plastic Sheet Test
The plastic sheet test is a useful screening tool, but it is not a precise measurement and is not accepted by all laminate manufacturers as sufficient evidence of slab readiness. A dry result under the sheet is encouraging, but it should be followed by moisture meter readings and additional testing where warranted.
Testing Only One Small Area of the Concrete Slab
Moisture conditions can vary significantly across a single slab. Testing only one location gives limited information. Multiple test points — particularly around walls, near plumbing, and at low points in the floor — provide a more accurate picture.
Using a Moisture Meter Without Understanding Its Readings
A moisture meter reading is only useful if you understand what the scale means for the specific meter being used and how that reading relates to the requirements of the laminate being installed. Without this context, a number on a display tells you very little.
Ignoring Moisture Around Walls and Plumbing
These areas are among the most common locations for elevated moisture in concrete floors. Skipping them during testing can leave significant problems undetected.
Installing Laminate Before New Concrete Has Sufficiently Dried
New concrete that hasn’t had sufficient time to dry will almost certainly fail a moisture test if tested properly. Proceeding with installation before adequate drying time, based on calendar time alone, is a predictable source of flooring problems.
Installing Flooring Without Checking the Manufacturer’s Moisture Requirements
Every laminate product has moisture tolerances specified in its installation documentation. Proceeding without checking these means you may be installing a product on conditions it’s not rated for, with no way to claim a remedy if problems develop later.
Assuming Underlay Can Fix Every Concrete Moisture Problem
Moisture barrier underlays and integrated moisture protection products are designed for use on slabs with acceptable moisture levels. They are not designed to manage severe, ongoing, or actively rising moisture. Using underlay to cover a moisture problem doesn’t resolve the problem — it usually delays the consequences.
Covering a Damp Concrete Floor Without Addressing the Moisture Source
If the source of moisture — rising damp, poor drainage, a damaged DPM, or a plumbing issue — is not addressed, the problem will continue even after flooring is installed. Surface moisture mitigation can help manage moisture to acceptable levels, but it cannot permanently contain an active moisture source without the underlying problem being resolved.
Skipping Moisture Testing Because a Moisture Barrier Is Being Installed
A moisture barrier protects the flooring from moderate levels of moisture vapour. It does not make moisture testing unnecessary. Testing tells you whether the moisture levels in the slab are within the range that the moisture barrier is designed to handle.
DIY Concrete Moisture Testing vs Professional Moisture Testing
For most residential laminate installations, DIY moisture testing can provide useful information. However, there are situations where a professional assessment offers more reliable results.
When DIY Moisture Testing May Be Suitable
DIY testing is a practical approach when:
- The installation is in a straightforward residential space
- The concrete slab is of standard thickness and age
- There are no visible signs of significant moisture problems
- The laminate product does not specify professional testing
A combination of the plastic sheet test, a moisture meter survey, and careful visual inspection is accessible, low-cost, and provides a reasonable assessment for most standard residential scenarios.
What DIY Moisture Tests Can and Cannot Tell You
DIY testing can identify obvious moisture problems and give a general indication of surface conditions. It can tell you whether further investigation is warranted. What it cannot reliably provide is the precise, calibrated data that some flooring manufacturers require before installation, particularly for higher-value or moisture-sensitive products.
When Professional Concrete Moisture Testing Is Worth Considering
Professional testing is worth considering when:
- The laminate manufacturer’s documentation requires specific testing methods
- There is a history of moisture problems in the property
- DIY testing results are inconclusive or show borderline readings
- The installation is in a commercial or high-use environment
- The slab is thick, old, or of uncertain construction
How Professional Testing Can Help Identify Moisture Issues
Professional testers use calibrated equipment, understand how to prepare test sites correctly, and can interpret results in the context of the specific installation. In cases where the source of moisture is unclear, a professional assessment can help identify whether the problem is rising damp, condensation, plumbing, or another cause — which in turn informs the appropriate remediation.
Why Larger Concrete Slabs May Require More Comprehensive Testing
A larger slab provides more opportunity for variation in moisture conditions across the surface. A single test location in a large warehouse slab tells you very little about conditions elsewhere. For large floor areas, a systematic testing programme with multiple test points per defined area is more informative.
When to Seek Professional Advice Before Installing Laminate
If moisture testing raises concerns that cannot be readily resolved — or if the property has an ongoing history of moisture issues — seeking advice from an experienced flooring professional or waterproofing specialist before proceeding is a sensible step. Installing a floor that subsequently fails due to a moisture problem is far more costly than the price of a professional assessment.
Frequently Asked Questions About Testing Concrete Floors for Moisture
How Do You Test a Concrete Floor for Moisture Before Installing Laminate?
The most practical approach for a residential installation starts with a visual inspection, followed by a plastic sheet test to check for surface moisture activity, and a moisture meter survey across multiple points on the slab. If these tests suggest elevated moisture, or if the laminate manufacturer’s requirements call for it, calcium chloride testing or in-situ relative humidity testing can provide more detailed information.
Can You Install Laminate Flooring on Damp Concrete?
Laminate flooring should not be installed on concrete that has moisture levels above the threshold specified by the flooring manufacturer. Doing so risks swelling, warping, mould growth, and adhesion failure. The concrete must either be allowed to dry further, treated with an appropriate moisture mitigation system, or — if the moisture source is active — remediated before installation proceeds.
How Long Should You Leave a Plastic Sheet on Concrete to Test for Moisture?
A minimum of 24 hours is commonly recommended, with 48 to 72 hours providing more reliable results. The room should be in its normal use conditions throughout the test.
Is the Plastic Sheet Test Accurate for Concrete Moisture?
The plastic sheet test is a screening method rather than a precise measurement. It can indicate the presence of surface moisture activity, but it does not provide a quantified moisture reading. Many flooring manufacturers do not accept it as sufficient evidence for installation purposes on its own.
Can You Use a Regular Moisture Meter on Concrete?
Some moisture meters are designed for timber only and may give unreliable readings on concrete. Use a meter that is specifically rated for concrete, and understand what the readings mean for that particular device before drawing conclusions.
What Is the Best Moisture Test for Concrete Floors?
In-situ relative humidity testing is generally considered the most complete method for assessing moisture within a concrete slab, as it captures conditions at depth rather than just at the surface. For practical DIY purposes, a combination of the plastic sheet test and a surface moisture meter survey is a reasonable starting point.
How Dry Does Concrete Need to Be for Laminate Flooring?
This varies by product. The acceptable moisture level is determined by the specific laminate product being installed and must be confirmed in the manufacturer’s installation documentation. There is no single figure that applies to all laminate products.
Does New Concrete Need Moisture Testing Before Laminate Installation?
Yes. Newly poured concrete contains significant residual moisture that takes months to dissipate under normal conditions. Moisture testing — not elapsed time — is the appropriate way to confirm whether the slab has dried sufficiently for laminate installation.
Can Moisture Come Through a Concrete Slab?
Yes. Moisture vapour moves through concrete from areas of higher moisture to lower moisture — typically from the ground beneath the slab upward through the concrete to the drier air above. This process is ongoing in many slabs, particularly those without an adequate damp-proof membrane beneath them.
Does Laminate Flooring Need a Moisture Barrier on Concrete?
In most cases, yes. Because concrete is porous and laminate is sensitive to moisture, a moisture barrier between the two is generally required or recommended. Check the specific product’s installation documentation to confirm what is required.
Can You Install Laminate Flooring Over Concrete Without Underlay?
Most laminate flooring manufacturers require underlay as part of the installation. Underlay provides support, acoustic benefits, and in many cases moisture protection. Installing without underlay is contrary to most manufacturers’ instructions and is likely to affect both the performance of the floor and any product warranty.
What Happens If You Install Laminate Flooring Over Wet Concrete?
The laminate boards will absorb moisture from the slab beneath. Over time, this causes the boards to swell and expand, leading to warping, joint peaking, buckling, or lifting. Mould can also develop beneath the flooring, which affects indoor air quality and can be difficult and costly to remedy. In most cases, the flooring cannot be reused once this type of damage has occurred.
Should You Waterproof Concrete Before Installing Laminate Flooring?
Full waterproofing is generally not required for laminate installed in dry areas. However, a moisture barrier beneath the laminate is typically required or recommended, and in cases where concrete moisture levels are elevated, a moisture mitigation system may be necessary. For installations adjacent to wet areas, ensuring that waterproofing in those spaces has been completed properly is important.
When Should You Retest Concrete for Moisture?
Retesting is advisable after any remediation work on the slab, after an extended drying period, and any time conditions in the property have changed significantly (e.g., flooding, plumbing repairs, or prolonged wet weather). It is also good practice to retest if some time has passed since the initial test before installation begins.
Make Sure Your Concrete Floor Is Ready Before Installing Laminate
Why Proper Moisture Testing Is an Important Part of Flooring Preparation
Laminate flooring is an investment. Taking the time to test the concrete beneath it — and to interpret the results correctly — is a straightforward step that protects that investment. Moisture problems that are caught before installation can be addressed; moisture problems discovered after installation are significantly more disruptive and costly to fix.
For Gold Coast homeowners, the local climate adds an extra layer of consideration. High summer humidity affects how quickly concrete dries and can contribute to condensation beneath flooring in enclosed spaces. Testing that accounts for these conditions provides a more reliable basis for installation decisions.
Address Concrete Moisture Problems Before Installing Your New Floor
If testing reveals elevated moisture levels, the appropriate response is to investigate the source, address it where possible, and confirm through retesting that conditions have improved. A moisture barrier or mitigation system can manage residual moisture in slabs with acceptable moisture levels, but it is not a substitute for resolving an active moisture problem.
Understanding moisture problems beneath flooring before installation is always preferable to learning about them afterwards.
Choose the Right Laminate Flooring and Underlay for Your Concrete Subfloor
Not all laminate is equally suited to ground-level or below-ground concrete applications. When selecting a product, pay attention to its moisture tolerance, whether it includes a moisture barrier, and whether the manufacturer permits installation on concrete in the environment where it will be used.
For those comparing options, looking at laminate and hybrid flooring side by side can help clarify which is the more suitable choice for a given concrete subfloor situation — particularly in areas with higher moisture exposure.
Get Expert Advice on Preparing Your Concrete Floor for Laminate
If there is any doubt about the moisture conditions of a concrete slab, or about which flooring product and preparation method is appropriate for the situation, getting advice from an experienced flooring retailer or installer is a sensible step.
Award Carpets Gold Coast has been helping Gold Coast homeowners with flooring decisions for over 30 years. The team can help with product selection, discuss moisture protection options, and provide professional flooring installation for those who prefer to leave the job to the experts. Contact Award Carpets Gold Coast to get expert advice on your flooring project.
Choosing Award Carpets Gold Coast for Your Laminate Flooring Needs
Getting your concrete subfloor ready is one part of the equation — choosing the right laminate flooring for your home is the other.
Award Carpets Gold Coast is an independent, family-run flooring retailer that has served the Gold Coast community for over 30 years. Stocking a wide range of laminate flooring options from leading Australian brands, the team is well placed to help you find a product suited to your subfloor conditions, lifestyle, and budget.
Whether you’re renovating an existing home, fitting out an investment property, or working through a new build, advice from someone who understands local conditions — including the Gold Coast’s humidity and climate considerations — can make a practical difference to how your floor performs over time.
For product selection guidance, answers to installation questions, or to arrange professional flooring installation on the Gold Coast, contact Award Carpets Gold Coast today.


