Thinking about installing engineered timber flooring over your concrete slab? You’re not alone. It’s one of the most popular flooring upgrades for Gold Coast homes—and for good reason. Engineered timber gives you that beautiful natural wood look with better stability and performance than solid hardwood, especially over concrete.
But here’s the thing: installation isn’t as simple as just laying boards down and calling it a day. Concrete slabs come with their own set of challenges, from moisture issues to surface preparation. Get it wrong, and you could be dealing with warping, gaps, or worse down the track.
In this guide, we’ll walk you through everything you need to know about installing engineered timber flooring on concrete—from prep work and moisture testing to installation methods and common mistakes to avoid. Whether you’re tackling a DIY project or just want to understand the process before hiring professionals, we’ve got you covered.
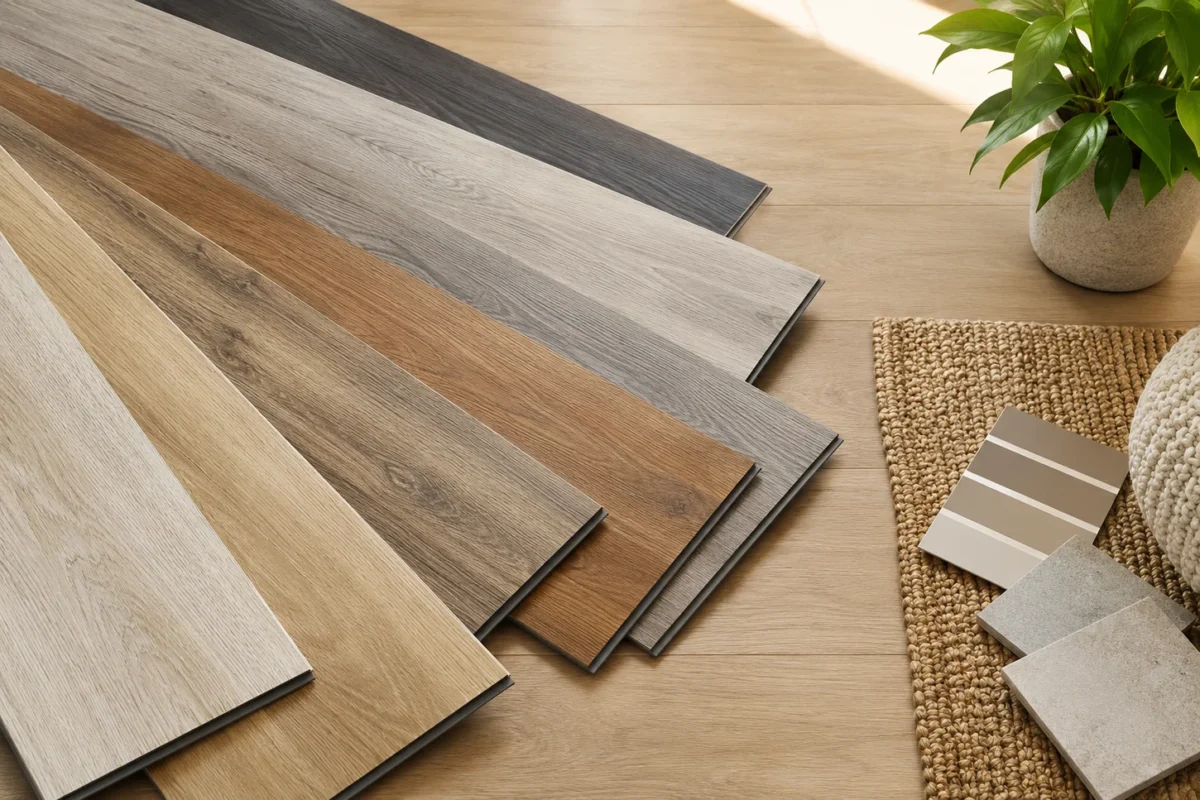
Engineered Timber Flooring on Concrete
Engineered timber flooring is built differently than solid hardwood. Instead of one thick piece of timber, it’s made up of multiple layers—a real wood veneer on top, bonded to layers of plywood or high-density fibreboard underneath. This layered construction makes it more dimensionally stable, meaning it’s less likely to expand, contract, or warp when exposed to moisture or temperature changes.
That stability is exactly why engineered timber works so well over concrete slabs. Concrete tends to hold moisture, especially in areas like the Gold Coast where humidity is part of everyday life. Solid hardwood floors can buckle or cup when exposed to that moisture. Engineered timber, on the other hand, is designed to handle those conditions without throwing a tantrum.
At Award Carpets Gold Coast, we’ve installed engineered timber over hundreds of concrete slabs in homes across the region. It’s a reliable choice for ground-floor living areas, kitchens, and even bedrooms—delivering that warm, natural timber aesthetic without the headaches.
Can You Install Engineered Timber Flooring on Concrete?
Yes—absolutely. Engineered timber flooring is specifically designed to be installed over concrete slabs, making it one of the best flooring options for slab-on-ground homes. Unlike solid timber, which requires a timber subfloor, engineered timber can go straight over concrete using the right installation method.
Why Engineered Timber Works on Concrete
The secret is in the construction. Because engineered timber flooring is made from multiple layers, it resists the movement that would normally damage solid wood. The cross-grain construction keeps the boards stable even when moisture levels fluctuate.
This makes it perfect for concrete slabs, which naturally absorb and release moisture depending on the weather. On the Gold Coast, where humidity swings between summer storms and dry spells, that stability is gold.
Engineered timber also offers flexibility in how it’s installed. You can float it over underlay, glue it directly to the slab, or even use a combination approach depending on your subfloor condition and budget.
Key Challenges to Consider
That said, concrete isn’t always plug-and-play. There are a few challenges you’ll need to address before installation:
- Moisture: Concrete slabs can trap moisture, especially if there’s no proper damp-proof membrane underneath. If moisture levels are too high, even engineered timber can suffer.
- Levelness: Concrete floors aren’t always perfectly flat. High spots, low spots, and uneven surfaces need to be corrected before you start laying boards.
- Alkalinity: Fresh concrete can be highly alkaline, which can break down some adhesives. New slabs need at least 90 days to cure (some require 3-4 months depending on thickness), so don’t rush this timeline.
- Expansion gaps: Timber floors need room to breathe. If you don’t leave proper expansion gaps around the perimeter, your boards can buckle as they naturally expand with humidity.
Get these basics sorted, and your engineered timber floor will perform beautifully for decades.

Installation Methods for Concrete Slabs
There are two main ways to install engineered timber flooring over concrete: floating or glue-down. Each method has its pros and cons, and the right choice depends on your slab condition, budget, and personal preferences.
Floating Floor Installation
A floating floor means the timber boards aren’t physically attached to the concrete. Instead, they click or lock together and “float” over a layer of underlay, which sits on top of a moisture barrier.
How it works:
You roll out a moisture barrier (usually plastic sheeting), lay down acoustic or cushioned underlay, then click the engineered timber boards together row by row. The whole floor is held in place by its own weight and the friction between boards.
Pros:
- Easier and faster to install, making it a popular DIY option
- More forgiving if your slab isn’t perfectly level
- Can be removed or replaced without damaging the slab
- Provides some acoustic cushioning and insulation
- Often more budget-friendly than glue-down
Cons:
- Can feel slightly “softer” or “bouncier” underfoot compared to glue-down
- Not recommended for very high-traffic commercial spaces
- Requires expansion gaps around all edges and fixed objects
Floating floors are ideal for most residential applications, especially if you’re working on a tight budget or doing the installation yourself.
Direct Stick (Glue-Down) Method
Glue-down installation involves using a moisture-curing polyurethane adhesive to bond the engineered timber boards directly to the concrete slab.
How it works:
After preparing the slab and applying a moisture barrier (if needed), you spread adhesive over small sections of the concrete using a trowel. Then you press the timber boards into the adhesive, ensuring full contact across the entire surface.
Pros:
- Creates a rock-solid, permanent installation
- Provides the firmest underfoot feel—no flex or bounce
- Better for high-traffic areas and commercial applications
- Allows for narrower expansion gaps in some cases
- Reduces noise transmission between floors in multi-storey homes
Cons:
- More expensive due to adhesive costs and labour
- Requires a perfectly clean, level, and dry slab
- More difficult to remove or replace if needed
- Takes longer to install
- Not a realistic DIY project for most homeowners
Glue-down is the premium option if you want maximum stability and a professional finish, especially in living areas where you’ll notice the difference underfoot.
Which Method is Best for Your Project?
Here’s a quick comparison to help you decide:
| Factor | Floating Floor | Glue-Down |
| Difficulty | DIY-friendly | Professional recommended |
| Cost | Lower | Higher |
| Installation Time | 1-2 days | 2-3 days (plus cure time) |
| Underfoot Feel | Softer, slight give | Solid, no movement |
| Subfloor Requirements | More forgiving | Must be perfectly level |
| Lifespan | 15-25 years | 20-30+ years |
| Reversibility | Easy to remove | Permanent |
If you’re renovating on a budget, doing it yourself, or working on a rental property, floating is your best bet. If you want the highest-quality finish and plan to stay in your home long-term, glue-down is worth the investment.
Still not sure? The team at Award Carpets Gold Coast can assess your slab and recommend the best method for your specific situation.
Tools and Materials Required
Before you start laying boards, make sure you’ve got everything you need. Missing a key tool halfway through the job is a guaranteed headache.
Essential Tools
- Tape measure and pencil – For marking cuts and planning layout
- Chalk line or laser level – To ensure straight rows
- Circular saw or mitre saw – For cutting boards to length
- Jigsaw – For cutting around doorframes and obstacles
- Pull bar and tapping block – For locking click-together boards
- Spacers – To maintain consistent expansion gaps (usually 10-15mm)
- Rubber mallet – For gently tapping boards into place
- Spirit level – To check for high and low spots on the slab
- Moisture meter – Essential for testing concrete moisture levels
- Notched trowel – If using glue-down method
- Knee pads – Trust us, you’ll thank yourself later
Key Materials
- Engineered timber flooring boards – Order 10% extra to account for cuts and wastage
- Moisture barrier (DPM) – Usually 200-micron polyethylene plastic sheeting
- Underlay – Acoustic or cushioned foam underlay for floating floors
- Adhesive – Moisture-curing polyurethane adhesive if gluing down
- Self-levelling compound – For correcting uneven areas on the slab
- Concrete sealer or primer – May be needed on porous or dusty slabs
- Transition strips and trims – For doorways and edges
- Cleaning supplies – Broom, vacuum, degreaser
Having everything ready before you start will keep the project moving smoothly and help you avoid trips to the hardware store mid-installation.
Preparing the Concrete Slab (Critical Step)
Here’s the truth: preparation is everything. You can buy the most expensive engineered timber on the market, but if your concrete slab isn’t properly prepped, your floor won’t last. Most installation failures come down to skipping or rushing this step.
Cleaning and Surface Preparation
Your concrete needs to be spotlessly clean before anything else happens. Dust, dirt, oil, grease, paint, adhesive residue—all of it has to go.
Start with a thorough sweep, then vacuum the entire area. For stubborn stains or contamination, use a concrete degreaser or floor cleaner. If there’s old adhesive or coating on the slab, you may need to grind or shot-blast the surface to get back to bare, clean concrete.
The slab should be completely dry before you proceed. If it’s been freshly cleaned with water, give it at least 24-48 hours to dry out.
Checking for Levelness
Concrete slabs are rarely perfectly flat. Even small deviations can cause problems with floating floors or prevent proper adhesive contact with glue-down installations.
Use a long spirit level or straight edge to check for high and low spots. As a rule of thumb, your slab should be within 3mm over a 2-metre span for floating floors, and within 2mm over a 3-metre span for glue-down installations.
If you find low spots, fill them with self-levelling compound. For high spots, you may need to grind them down. This might sound like overkill, but it makes a massive difference in how your finished floor looks and performs.
Moisture Testing
This is non-negotiable. Concrete holds moisture, and if you install timber flooring over a damp slab, you’re asking for trouble—warping, cupping, mould, and adhesive failure are all on the table.
Use a concrete moisture meter to test the slab. Different products have different moisture requirements, and testing methods vary (some use electrical impedance meters, others use relative humidity probes). Always refer to your specific manufacturer’s technical data sheet for their moisture limits—what’s acceptable for one product might void the warranty on another. Check multiple spots across the room, not just one area.
If your slab is too wet, you’ll need to wait for it to dry out, improve ventilation, or use a moisture remediation system. In high-humidity areas like the Gold Coast, a moisture barrier is essential regardless of your test results.
Applying a Moisture Barrier
Even if your moisture test comes back acceptable, a moisture barrier is cheap insurance. It stops ground moisture from moving up through the slab and into your timber flooring.
For floating floors, lay down 200-micron polyethylene plastic sheeting across the entire slab. Overlap the sheets by at least 200mm and tape the seams with waterproof tape. Run the barrier up the walls by about 50mm—you’ll trim it off later once the skirting boards are installed.
For glue-down installations, you may use a liquid moisture barrier or primer depending on your adhesive manufacturer’s recommendations. Some modern adhesives include moisture barrier properties, but always check the technical specs.
Acclimating Engineered Timber Flooring
Before you install a single board, your engineered timber needs time to adjust to the environment where it’s going to live. This process is called acclimation, and skipping it is one of the fastest ways to ruin a floor.
Timber is a natural material, and it responds to temperature and humidity. If your boards have been stored in a warehouse or truck, they need time to reach equilibrium with your home’s conditions. Otherwise, they’ll expand or contract after installation, leading to gaps or buckling.
Here’s how to do it properly:
- Keep the boxes sealed and stack them flat in the room where they’ll be installed (cross-stack them if you have multiple boxes)
- Leave them for at least 48-72 hours before starting installation (some manufacturers recommend up to a week)
- Keep the room at normal living conditions—around 15-25°C with 40-60% relative humidity
- Don’t store boards in a garage, shed, or outside—they need to acclimate to the actual indoor environment
- Only open boxes as you’re ready to install—opening them too early can cause boards to warp or bow before they’re locked together
If you’re working with the flooring installation team at Award Carpets Gold Coast, they’ll advise you on the exact acclimation period based on the product and local conditions.
Step-by-Step Installation Process
Right—now that your slab is prepped and your boards are acclimated, it’s time to actually install the floor. Whether you’re floating or gluing down, the process follows a similar structure with a few key differences.
Step 1: Plan the Layout
Don’t just start laying boards from one wall and hope for the best. Take a few minutes to plan your layout so you avoid narrow cuts at the edges and awkward transitions.
Measure the width of the room and divide it by the width of your boards. This tells you how many rows you’ll need and whether your final row will be too narrow (anything less than 50mm wide looks terrible and is hard to install).
If your final row would be too narrow, start by ripping down the first row so both the first and last rows are balanced. It’s a bit more work upfront, but the finished result looks far more professional.
Also decide which direction you want the boards to run. Typically, timber floors look best running parallel to the longest wall or towards the main source of natural light.
Step 2: Install Moisture Barrier and Underlay
Lay down your moisture barrier first, making sure it covers the entire floor with overlapping seams taped together. Don’t skip this step, even if you think your slab is dry—Gold Coast humidity is unpredictable.
For floating floors, roll out your underlay on top of the moisture barrier. Most underlay comes in rolls with a built-in vapour barrier, but if yours doesn’t, you’ll need the separate plastic sheeting underneath.
Butt the underlay edges together without overlapping. Some products have tape strips to join the seams—use them.
Step 3: Lay the First Row
The first row sets the tone for the entire floor, so take your time and get it right.
Place spacers (usually 10-15mm) along the wall to maintain an expansion gap. Start in the left corner and lay your first board with the tongue facing the wall. If you’re using a click-lock system, you may need to cut off the tongue on the first row.
Continue laying boards end-to-end along the wall, clicking them together. Stagger the end joints by at least 300mm from row to row for a natural look and better structural integrity. Use offcuts from the previous row to start the next row if they’re long enough (minimum 300mm).
Check with a spirit level regularly to ensure the row is straight. Any deviation here will compound across the whole floor.
Step 4: Install Remaining Boards
Work your way across the room row by row. If you’re using a floating floor, angle the tongue into the groove and press down until the boards click together. Use a tapping block and rubber mallet to close up any gaps—never hammer directly on the boards.
Keep your expansion gap consistent around the entire perimeter by using spacers against the walls. Remember, timber needs room to move.
For every row, stagger the end joints to avoid creating a repetitive pattern or weak spots. Most manufacturers recommend at least 300mm between end joints in adjacent rows.
Step 5: Glue-Down Application (If Applicable)
If you’re gluing down, work in small sections—usually one or two rows at a time. Spread adhesive onto the concrete using a notched trowel, following the manufacturer’s instructions for coverage and trowel size.
Press each board firmly into the adhesive, ensuring full contact across the entire back surface. Some installers use a roller to press the boards down evenly.
Work quickly—most adhesives start to skin over within 30-45 minutes. Don’t spread more glue than you can cover in that time.
Wipe off any excess adhesive that squeezes up between boards immediately using a damp cloth. Once it cures, it’s a nightmare to remove.
Step 6: Cutting and Fitting Around Obstacles
You’ll inevitably need to cut boards to fit around doorframes, pipes, vents, and other obstacles. This is where your jigsaw and patience come in handy.
For doorframes, it’s usually easier to undercut the architrave with a flush-cut saw so the flooring can slide underneath, rather than trying to scribe a perfect cut around the profile.
For pipes or vents, measure carefully and drill holes slightly larger than the obstacle to allow for expansion. Use silicone or a pipe collar to cover the gap.
Step 7: Final Rows and Finishing
The last row is often the trickiest because you’ll need to measure and cut boards lengthways to fit the remaining gap, minus your expansion gap.
Use a pull bar to lock the final row into place—it gives you the leverage you need in tight spaces.
Once all boards are down, remove the spacers and install skirting boards, scotia, or trim to cover the expansion gap. Don’t nail the skirting into the floor—fix it to the wall only.
Install transition strips at doorways or where your timber meets other flooring types. These strips allow for movement and create a clean, finished edge.
Common Mistakes to Avoid
Even experienced DIYers make mistakes when installing engineered timber over concrete. Here are the biggest ones we see at Award Carpets Gold Coast—and how to avoid them.
Skipping Moisture Testing
This is the number one mistake, hands down. People assume their concrete is dry because it looks dry, but moisture can be hiding underneath.
Skipping the moisture test is a gamble with your entire floor. If the slab is too wet, your timber will absorb that moisture and warp, cup, or buckle within weeks or months of installation.
Always test the moisture content. If it’s too high, don’t proceed until the slab has dried out or you’ve installed a proper moisture remediation system.
Poor Subfloor Preparation
Trying to lay engineered timber over a dirty, uneven, or contaminated slab is asking for failure. Adhesive won’t bond properly, floating floors will flex and creak, and you’ll end up with visible dips and humps in the finished surface.
Put in the time to clean, level, and prepare the slab correctly. It’s not the fun part of the job, but it’s the most important.
Incorrect Installation Method
Choosing the wrong installation method for your situation is another common problem. For example, gluing down timber to a slab that isn’t level or has moisture issues is a recipe for disaster.
Similarly, floating a floor in a high-traffic commercial space where glue-down would be more appropriate can lead to premature wear and movement.
If you’re not sure which method is right for your project, get professional advice before you start.
Not Allowing Expansion Gaps
Timber moves. It expands when it’s humid and contracts when it’s dry. If you don’t leave room for that movement, the boards will push against walls, fixed objects, or each other—and buckle.
Always maintain a minimum 10mm expansion gap around the entire perimeter of the room and around any fixed objects like kitchen islands or fireplaces. In Gold Coast’s humid climate, you might want to go larger—12-15mm gives you extra insurance.
In larger rooms (over 8-10 metres in any direction), you’ll need expansion joints in the middle of the floor as well, covered with T-moulding or transition strips. Don’t try to run boards continuously across huge areas without breaks—the cumulative expansion will find somewhere to go, and it won’t be pretty.
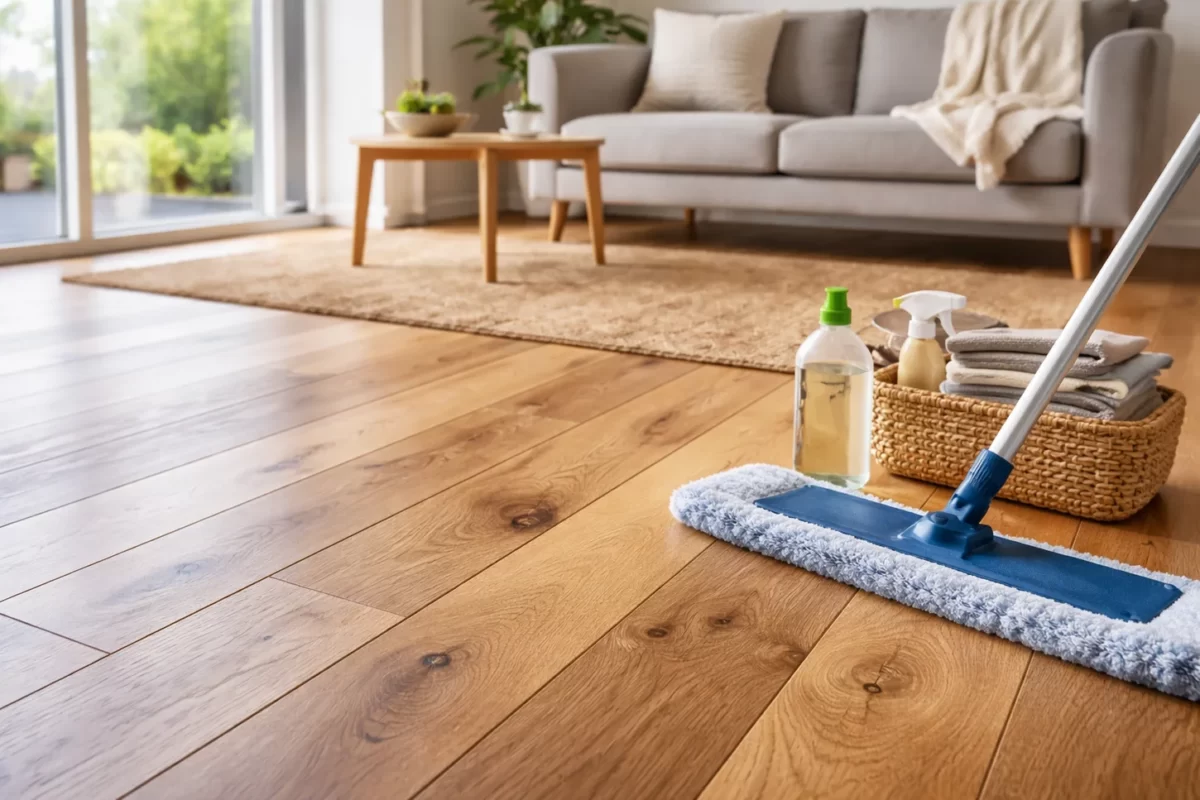
Maintenance Tips After Installation
You’ve just installed a beautiful new floor—now let’s keep it that way. Engineered timber is low-maintenance compared to solid hardwood, but it still needs some care.
Cleaning and Care
Sweep or vacuum regularly to remove dirt and grit that can scratch the surface. Use a soft-bristle broom or a vacuum with a hard-floor setting (turn off the beater bar).
For mopping, use a damp mop—not soaking wet. Excess water is timber’s enemy, even with engineered floors. Use a pH-neutral timber floor cleaner, not harsh chemicals, bleach, or abrasive products.
Wipe up spills immediately. Even though engineered timber is more moisture-resistant than solid timber, it’s still wood. Standing water can stain or damage the finish over time.
Avoid steam mops. The heat and moisture combination can damage the finish and cause the layers to separate.
Protecting Your Flooring
Place doormats at entrances to catch dirt and moisture before it hits your floor. The less grit that gets tracked in, the longer your finish will last.
Use felt pads under furniture legs to prevent scratches and dents. Avoid dragging heavy furniture across the floor—lift and carry instead.
In high-traffic areas or under office chairs, consider using a protective mat to reduce wear.
Keep indoor humidity levels between 40-60% if possible. Extreme dryness or humidity can cause timber to shrink or expand excessively. In the Gold Coast climate, a dehumidifier might be helpful during particularly humid periods.
Trim pet nails regularly to avoid scratches, and clean up any pet accidents immediately.
Benefits of Professional Installation
While floating floor installation is a realistic DIY project for confident renovators, there are solid reasons to consider professional installation—especially for glue-down jobs or if you’re not experienced with flooring.
Professional installers bring experience and expertise. They’ve seen every type of concrete slab, dealt with moisture issues, and know how to troubleshoot problems before they become disasters. That means your floor gets installed right the first time.
They also have access to commercial-grade tools and equipment—concrete grinders, laser levels, professional trowels, and adhesive systems that aren’t readily available to DIYers.
Speed matters too. A professional crew can complete in days what might take you weeks of weekend work.
And here’s the big one: warranty protection. Many timber flooring manufacturers require professional installation for their warranty to remain valid. If something goes wrong with a DIY job, you’re on your own.
At Award Carpets Gold Coast, our flooring installation team has over 30 years of experience installing engineered timber over concrete slabs across the Gold Coast. We handle everything from moisture testing and slab prep to the final finishing touches, and we back our work with a solid guarantee.
If you want the peace of mind that comes with professional installation, we’re here to help.
FAQs About Installing Engineered Timber on Concrete
Do I Need a Moisture Barrier on Concrete?
Yes, always. Even if your moisture test comes back acceptable, concrete can absorb moisture from the ground or surrounding environment—especially in humid areas like the Gold Coast. A moisture barrier is cheap insurance that protects your investment.
For floating floors, use 200-micron polyethylene sheeting. For glue-down installations, use a liquid moisture barrier or primer as recommended by your adhesive manufacturer.
Can I Install Engineered Timber Flooring Myself?
If you’re handy and comfortable with DIY projects, a floating floor installation is absolutely doable. It requires basic tools, careful planning, and attention to detail, but it doesn’t demand professional-level skills.
Glue-down installation, on the other hand, is more technical. You need to achieve perfect slab preparation, work quickly with adhesive, and ensure proper coverage and bond. Most homeowners are better off hiring professionals for glue-down jobs.
If you’re unsure, start with a small room like a bedroom or study to build confidence before tackling larger living areas.
How Long Does Installation Take?
It depends on the size of the room, installation method, and whether you’re doing prep work yourself.
For a standard living room (around 30-40 square metres), a floating floor might take a confident DIYer a full weekend—one day for prep and moisture barrier, one day for laying boards.
Professional installers can usually complete the same room in one to two days.
Glue-down installations take longer because you need to work in sections and allow adhesive to cure. Add an extra day or two for glue-down projects, and don’t walk on the floor for at least 24 hours after installation.
Is Glue-Down Better Than Floating?
It depends on your priorities and situation. Glue-down provides a more solid, premium feel underfoot with no flex or movement. It’s ideal if you want the highest quality finish and plan to stay in your home long-term.
Floating floors are more budget-friendly, easier to install, and more forgiving if your slab isn’t perfectly level. They’re great for DIY projects, rentals, or situations where you might want to replace the floor later.
Neither method is objectively “better”—it’s about what works best for your specific project, budget, and skill level.
How Long Does Engineered Timber Flooring Last?
With proper installation and maintenance, engineered timber flooring can last 20-30 years or more. Glue-down installations tend to last longer than floating floors because they’re more stable and less prone to movement.
The lifespan also depends on the quality of the product, the thickness of the timber veneer (thicker is better), and how well you maintain it.
High-quality engineered timber with a thick wear layer can even be sanded and refinished once or twice over its lifetime, just like solid timber.
Expert Engineered Timber Installation at Award Carpets Gold Coast
Installing engineered timber flooring over a concrete slab isn’t rocket science, but it does require careful preparation, the right materials, and attention to detail. Whether you’re floating or gluing down, success comes down to proper moisture testing, thorough slab prep, and following best practices every step of the way.
At Award Carpets Gold Coast, we’ve been helping locals transform their homes with beautiful timber floors for over 30 years. As an independent family-run business, we offer expert advice, competitive pricing, and professional installation backed by decades of experience.
We stock a huge range of engineered timber flooring options from leading Australian brands and unique boutique lines you won’t find anywhere else. From helping you choose the right product to delivering flawless installation, our team is here to make the process simple and stress-free.
Ready to upgrade your floors? Visit us at Award Carpets Gold Coast, explore our range online, or call our team to book your free quote today. Let’s bring your vision to life with engineered timber flooring that’s built to last.