Laminate flooring is a smart choice for Gold Coast homes—it’s durable, affordable, and comes in stunning designs that mimic the look of hardwood or stone. But even the best laminate can look (and perform) poorly if it’s not installed correctly.
Whether you’re tackling a DIY project or overseeing a professional installation, knowing what can go wrong is half the battle. From skipping acclimatisation to rushing through the layout, small mistakes during installation can lead to big problems down the track—think warping, buckling, gaps, and even costly repairs.
In this guide, we’ll walk you through the most common laminate flooring installation mistakes and how to avoid them, so your new floors look great and last for years.
Why Proper Laminate Flooring Installation Matters
Installing laminate flooring isn’t just about clicking planks together. The way your floor is laid has a direct impact on how long it lasts, how it looks, and how much value it adds to your home.
Impact on Durability and Longevity
When laminate flooring is installed correctly, it can last 15 to 25 years or more. But if the installation is rushed or done incorrectly, you could be dealing with loose boards, squeaks, and moisture damage within just a few years. Proper preparation and technique are essential to getting the most out of your investment.
How Installation Affects Appearance and Value
Even high-quality laminate can look cheap if it’s poorly installed. Misaligned planks, visible gaps, and uneven transitions can ruin the aesthetic you’re going for. On the flip side, a clean, professional installation enhances your home’s appearance and can even boost resale value.
The Cost of Fixing Installation Mistakes
Fixing a botched laminate installation isn’t cheap. Depending on the severity of the issue, you may need to pull up entire sections of flooring, replace damaged boards, or redo underlayment and subfloor prep. It’s always more cost-effective to do it right the first time.
Skipping Laminate Floor Acclimatisation
One of the most overlooked steps in laminate flooring installation is acclimatisation—and it’s one of the biggest reasons floors fail prematurely.
What Is Acclimatisation?
Acclimatisation is the process of allowing your laminate planks to adjust to the temperature and humidity levels of the room where they’ll be installed. Laminate is made from compressed wood fibres, which expand and contract in response to moisture and temperature changes.
Problems Caused by Not Acclimatising Boards
If you skip this step, your laminate boards may expand after installation, causing buckling, peaking, or warping. In some cases, boards may shrink, leading to unsightly gaps between planks. These issues are especially common in the Gold Coast’s humid climate, where moisture levels can fluctuate throughout the year.
How Long Laminate Flooring Should Acclimatise
Most manufacturers recommend letting laminate planks sit in the installation room for at least 48 to 72 hours before laying them. Keep the boxes unopened and stacked flat during this time. It’s a simple step that can save you from major headaches later.
Poor Subfloor Preparation
Your subfloor is the foundation of your entire flooring system. If it’s not properly prepared, your laminate won’t perform as it should.
Why a Clean and Level Subfloor Is Essential
Laminate flooring relies on a smooth, level surface to lock together properly. Any debris, bumps, or uneven spots can prevent planks from clicking into place, leading to gaps, movement, and even cracking over time.
Issues Caused by Uneven Subfloors
An uneven subfloor can cause your laminate to feel unstable underfoot. You may notice soft spots, squeaking, or planks that separate at the seams. In extreme cases, the locking mechanism can break, forcing you to replace entire sections.
Before laying laminate, sweep and vacuum thoroughly, and use a levelling compound to address any dips or high spots. A straightedge or spirit level can help you identify problem areas.
The Importance of Moisture Testing
Moisture is laminate’s worst enemy. Before installation, test your subfloor for moisture using a moisture metre. Concrete slabs, in particular, can hold moisture that damages laminate over time. If moisture levels are too high, install a vapour barrier or allow the subfloor to dry out completely before proceeding.
Choosing the Wrong Underlayment
Underlayment might seem like a minor detail, but it plays a crucial role in the performance and comfort of your laminate flooring.
The Role of Underlay in Laminate Flooring
Underlayment provides cushioning, sound reduction, moisture protection, and helps correct minor subfloor imperfections. It also improves the feel of the floor underfoot, making it softer and quieter than timber or tile.
Common Underlayment Mistakes
Using the wrong type of underlayment—or skipping it altogether—can lead to a range of problems. Some laminate products come with attached underlayment, so adding an extra layer can create too much cushion and prevent proper locking. On the other hand, using underlayment that’s too thin or not moisture-resistant can leave your floors vulnerable to damage.
How to Choose the Right Underlay
Look for underlayment that’s specifically designed for laminate flooring. If you’re installing over concrete, choose a product with built-in moisture protection. For upper-level rooms, consider acoustic underlay to reduce noise transfer. Always check the manufacturer’s recommendations to ensure compatibility with your flooring.
Ignoring Expansion Gaps
Laminate flooring needs room to breathe. Failing to leave adequate expansion gaps is one of the most common—and most damaging—installation mistakes.
Why Laminate Flooring Needs Room to Expand
As humidity and temperature change, laminate boards naturally expand and contract. If there’s no space for this movement, the floor will push against walls, door frames, or cabinets, causing buckling, peaking, and damage to the locking system.
Recommended Expansion Gap Sizes
Most manufacturers recommend leaving a 10mm to 12mm expansion gap around the perimeter of the room, as well as around any fixed objects like pipes or door frames. These gaps will be hidden by skirting boards or beading, so they won’t affect the finished look.
How Gold Coast Climate Affects Laminate Floors
The Gold Coast’s subtropical climate means higher humidity levels, especially during summer. This makes expansion gaps even more important. Without them, your laminate is far more likely to buckle during the wet season. Don’t skip this step—it’s essential for long-term performance.
Rushing the Installation Process
Laminate flooring installation might look easy on YouTube, but rushing through it almost always leads to mistakes.
Problems with Improper Board Locking
Laminate planks are designed to click and lock together at a specific angle. If you rush or force the boards, they may not lock properly, leading to gaps, uneven seams, and boards that pop up over time. Some planks may even crack or break if too much pressure is applied.
How Misaligned Planks Affect Results
Starting with a misaligned first row can throw off your entire floor. Even a small angle or gap at the beginning will compound as you work across the room, resulting in a crooked, unprofessional finish. Take your time to get the first few rows perfectly straight and square.
Why Patience Leads to Better Flooring Outcomes
A good laminate installation takes time. Rushing through subfloor prep, skipping acclimatisation, or forcing planks into place will only cost you more in the long run. Slow down, follow the instructions, and don’t be afraid to pull up a row and start again if something doesn’t look right.
Not Planning the Floor Layout
Jumping straight into installation without a clear plan is a recipe for awkward cuts, wasted materials, and a less-than-ideal finish.
Why Layout Planning Matters
Planning your layout helps you avoid ending up with narrow slivers of laminate along one side of the room, or having to make difficult cuts around doorways and corners. It also ensures your floor pattern looks balanced and professional.
Avoiding Small or Awkward Board Cuts
Start by measuring the width of the room and dividing by the width of your planks. If the final row will be less than 50mm wide, adjust your starting row so the floor is more balanced. The same goes for length—plan your layout so you’re not left with tiny offcuts at the end of the room.
Tips for a Balanced, Professional Finish
Consider starting in the centre of the room and working outwards, or dry-lay a few rows before committing to the installation. Use a staggered pattern with joints offset by at least 300mm to create a more natural, stable appearance. A little planning goes a long way.
Incorrectly Handling Doorways and Transitions
Doorways and transition areas are tricky, and they’re where many DIYers run into trouble.
Cutting Around Door Frames the Right Way
Rather than trying to cut laminate to fit around door frames, it’s easier (and neater) to undercut the frame itself. Use a handsaw or oscillating tool to trim the bottom of the door frame, allowing the laminate to slide underneath. This creates a clean, seamless look.
Choosing Proper Transition Strips
Transition strips are essential when laminate flooring meets carpet, tile, or another type of flooring. They cover expansion gaps and create a smooth, safe transition between surfaces. Choose a profile that matches the height difference and style of your flooring.
Common Transition Installation Errors
Don’t glue or nail laminate directly to transition strips—this restricts movement and can cause damage. Instead, use T-moulding, reducers, or end caps that allow the laminate to float freely while still providing a polished finish.
Using the Wrong Tools or Techniques
Having the right tools makes all the difference when installing laminate flooring. Using makeshift equipment or improper techniques can lead to damaged boards and frustrating results.
Essential Tools for Laminate Installation
At a minimum, you’ll need a tapping block, pull bar, spacers, a saw (circular, jigsaw, or mitre saw), tape measure, pencil, and a utility knife. A quality underlayment roller, moisture metre, and spirit level are also highly recommended. Using the proper tools ensures clean cuts, tight seams, and a professional finish.
DIY vs Professional Techniques
While laminate is considered a DIY-friendly flooring option, there’s a big difference between a confident DIYer and a seasoned professional. Professionals know how to handle tricky layouts, transitions, and problem subfloors. They also work faster and with fewer mistakes, which can save you time and materials.
How Mistakes Happen with Improper Tools
Trying to cut laminate with a blunt blade, tapping boards without a proper block, or skipping spacers can all lead to chipped edges, broken locks, and uneven gaps. Invest in the right tools or hire a professional if you’re unsure—it’ll pay off in the quality of the finished floor.
Laminate Flooring Installation FAQs
Can Laminate Be Installed Over Existing Floors?
Yes, in many cases. Laminate can be installed over vinyl, tile, or even existing laminate, as long as the surface is clean, level, and structurally sound. However, it’s not recommended to install laminate over carpet or cushioned vinyl, as these surfaces are too soft and unstable. Always check the manufacturer’s guidelines before proceeding.
How Long Does Installation Take?
For an average-sized room (around 20 square metres), a DIY installation can take anywhere from one to three days, depending on your experience level and the complexity of the layout. Professional installers can often complete the same job in a single day. Remember to factor in acclimatisation time before you start.
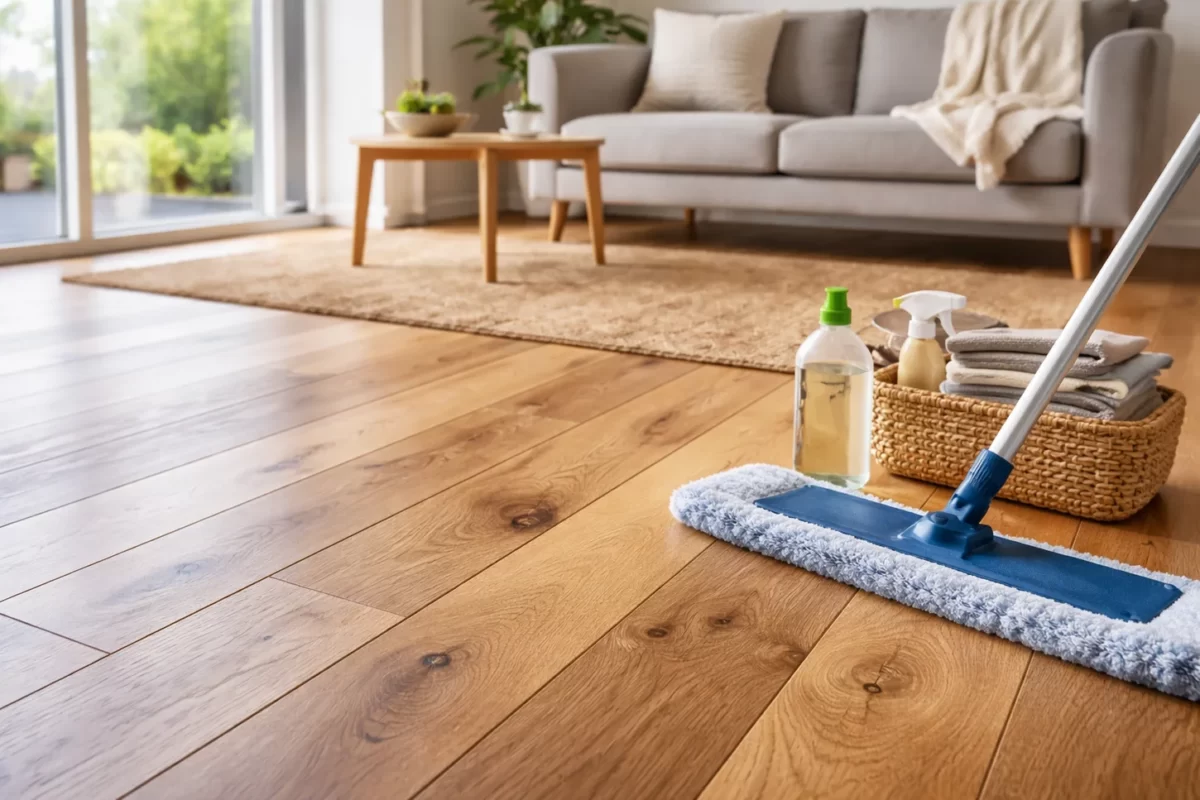
How to Maintain Laminate Flooring After Installation
Laminate flooring is low-maintenance, but a few simple habits will keep it looking great. Sweep or vacuum regularly to remove dirt and grit, and mop with a damp (not wet) microfibre mop and a laminate-safe cleaner. Avoid excessive water, steam mops, and abrasive cleaners, which can damage the surface. Use felt pads under furniture legs to prevent scratches.
Get Professional Help with Laminate Flooring from Award Carpets Gold Coast
Installing laminate flooring correctly requires attention to detail, the right tools, and a bit of patience. If you’re not confident tackling the job yourself, or you want the peace of mind that comes with a flawless finish, the team at Award Carpets Gold Coast is here to help.
We’ve been supplying and installing quality laminate flooring across the Gold Coast for over 30 years. As an independent family-run business, we offer expert advice, competitive pricing, and professional flooring installation that’s done right the first time. Whether you’re renovating a single room or your entire home, we’ll guide you through every step—from choosing the perfect laminate to ensuring a flawless installation.
Visit our showroom, browse our range online, or contact us today to book your free quote. Let’s transform your Gold Coast home with beautiful, long-lasting laminate flooring that’s built to perform.