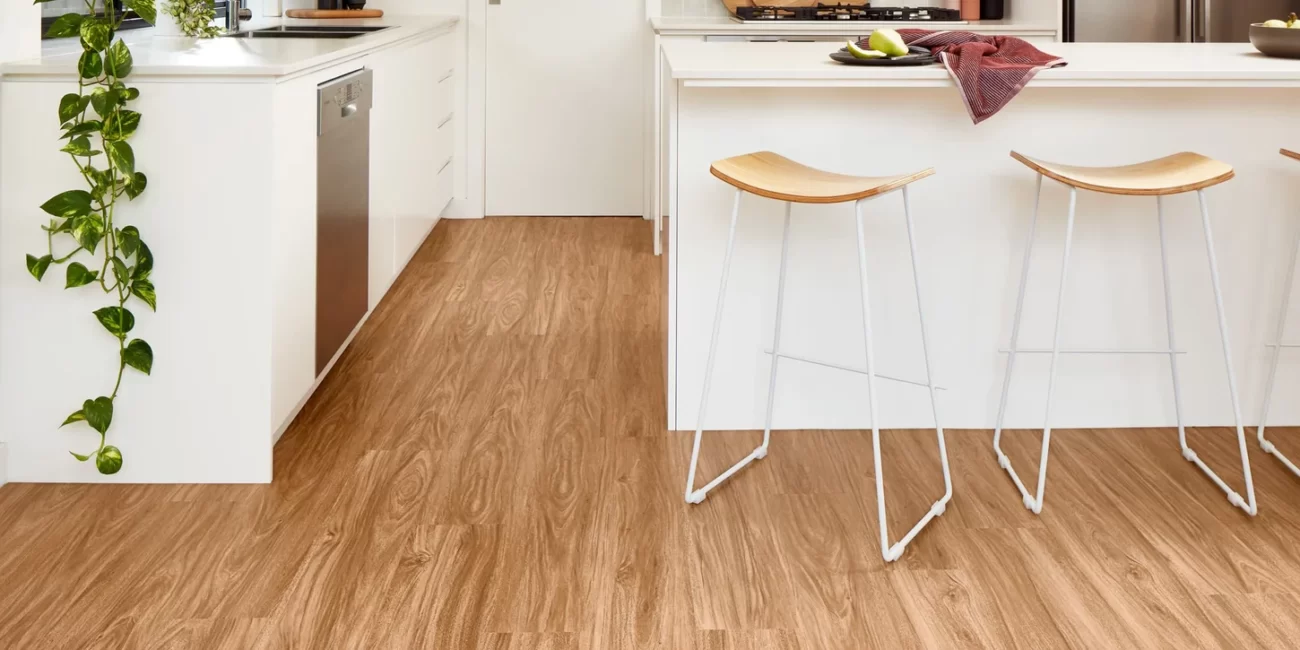
Installing hybrid flooring might seem straightforward, but even small missteps can lead to costly repairs and frustrating results. Whether you’re considering a DIY project or want to understand what professional installers should be doing, knowing the common pitfalls can save you time, money, and headaches down the track.
At Award Carpets Gold Coast, we’ve seen it all—from buckling boards to squeaky floors—and most issues trace back to avoidable installation errors. Let’s walk through the mistakes that trip up even experienced renovators, and how to steer clear of them.
Why Correct Hybrid Flooring Installation Matters
Getting your hybrid flooring installation right isn’t just about aesthetics—it’s about performance, longevity, and getting your money’s worth. A properly installed floor can last decades, while poor workmanship can lead to problems within months.
How Installation Quality Affects Durability and Appearance
Even premium hybrid flooring loses its appeal when installed incorrectly. Gaps between planks, uneven surfaces, and misaligned rows create visual flaws that cheapen the overall look. More importantly, installation errors compromise the structural integrity of the floor, leading to accelerated wear in high-traffic areas.
The locking system that holds hybrid planks together relies on precision. When planks aren’t fitted correctly, the joints weaken over time, allowing moisture ingress and creating points of failure that spread across the floor.
The Hidden Costs of Installation Mistakes
What starts as a minor installation error can snowball into expensive repairs. Buckling floors may require complete removal and reinstallation. Moisture damage from inadequate preparation can affect not just the flooring but the subfloor beneath, multiplying repair costs significantly.
On the Gold Coast, where humidity levels fluctuate throughout the year, installation mistakes become magnified. A floor that might survive in drier climates can fail quickly in our coastal environment when proper installation protocols aren’t followed.
Why Even “Easy Install” Flooring Can Go Wrong
Hybrid flooring is marketed as DIY-friendly, and while it’s more forgiving than some materials, that doesn’t mean it’s foolproof. The click-lock systems are engineered for ease, but they still demand attention to detail, proper technique, and the right conditions.
Many homeowners underestimate the importance of preparation work—thinking that laying the planks is the entire job. In reality, what happens before the first plank goes down often determines the success of the entire installation.
DIY vs Professional Installation Risks
There’s nothing wrong with DIY hybrid flooring installation, provided you understand the scope and have realistic expectations. Small rooms with straightforward layouts are manageable for confident DIYers. Large areas, complex layouts, or challenging subfloor conditions? That’s where professional experience pays off.
Professional installers bring specialised tools, years of experience troubleshooting tricky situations, and—crucially—warranties that protect your investment. They also complete jobs faster and with less material waste than most DIY attempts.
Skipping Proper Subfloor Preparation
If there’s one step that separates amateur installations from professional results, it’s subfloor preparation. Skipping or rushing this stage virtually guarantees problems later.
Why Subfloor Flatness Is Critical for Hybrid Flooring
Hybrid flooring is a floating floor system, meaning it sits on top of the subfloor rather than being glued or nailed down. This makes it vulnerable to imperfections in the surface beneath. Even small irregularities translate through to the planks above, creating stress points that prevent proper locking and lead to movement underfoot.
Most manufacturers specify that subfloors should be flat within 3mm over a 1-metre span. Exceeding this tolerance means planks won’t sit flush, locking mechanisms won’t engage fully, and the floor will flex unnaturally when walked on.
Issues Caused by Uneven Concrete or Timber Subfloors
Concrete slabs often have high spots from curing imperfections or low spots from settling. Timber subfloors can warp, sag between joists, or have uneven boards. Both create problems for hybrid installations.
Planks installed over uneven concrete will rock, creating gaps that open and close as you walk. Over time, this movement damages the locking system and can crack or chip the planks themselves. With timber subfloors, squeaks develop as planks shift against the uneven surface below.
The Role of Levelling Compounds and Repairs
Levelling compounds fill depressions and create the smooth, flat surface hybrid flooring needs. Self-levelling varieties flow into low spots, while patching compounds address localised damage. Both require proper application—correct mixing ratios, adequate drying time, and surface preparation.
For timber subfloors, repairs might include replacing damaged boards, adding extra screws to reduce movement, or installing new underlayment. Sometimes sanding high spots is necessary, though major levelling issues may require professional assessment.
How Professional Installers Prepare a Subfloor
Professional flooring installers begin every job with thorough subfloor inspection. They use laser levels or long straightedges to identify irregularities, moisture meters to check for dampness, and specialised grinding equipment to remove high spots.
They’ll clean the subfloor meticulously—dust, debris, and loose material prevent proper adhesion of levelling compounds and underlayment. They understand which products suit different subfloor types and environmental conditions, particularly important in Gold Coast’s humid climate.
Installing Hybrid Flooring Without Acclimatisation
Rushing to install hybrid flooring the moment it arrives is one of the most common mistakes, and one of the easiest to avoid.
What Acclimatisation Means for Flooring Materials
Acclimatisation allows flooring materials to adjust to the temperature and humidity of their installation environment. Like all materials, hybrid flooring components expand and contract with environmental changes. Installing before acclimatisation means the floor will still be adjusting after installation—often leading to gaps or buckling.
This adjustment period lets the planks reach equilibrium with room conditions, minimising dimensional changes post-installation. It’s particularly crucial when flooring has been stored in different conditions—cold warehouses in winter, for instance.
How Temperature and Humidity Affect Hybrid Planks
While hybrid flooring is more dimensionally stable than timber, it’s not completely immune to environmental factors. The core materials respond to temperature and moisture, albeit subtly. When planks are installed before reaching room equilibrium, they may expand slightly as they warm up or contract as they dry out.
Gold Coast homes experience significant humidity variations between seasons. Flooring brought from climate-controlled storage into a humid summer home will behave differently than the same product installed during drier winter months.
Problems That Occur When Flooring Is Installed Too Quickly
Installing non-acclimatised flooring can result in gaps appearing between planks as materials contract, or buckling and lifting as they expand. These issues might not appear immediately—sometimes taking weeks to manifest—making it harder to identify the cause.
In extreme cases, rapid environmental adjustment can stress locking mechanisms, causing them to release or crack. This creates loose planks that move underfoot and allow moisture penetration.
Recommended Acclimation Period Before Installation
Most manufacturers recommend storing hybrid flooring in the installation room for at least 48 hours before laying. The boxes should be opened or at least stacked with gaps between them to allow air circulation around all planks.
During acclimatisation, maintain the room temperature between 18°C and 28°C—the range you’ll maintain after installation. Run heating or cooling systems if necessary. In particularly humid conditions, use dehumidifiers to bring moisture levels within acceptable ranges.
Forgetting Expansion Gaps Around the Room
Expansion gaps might seem like unnecessary fussiness, but they’re essential for floating floor systems. Skipping them ranks among the top installation mistakes.
Why Floating Floors Need Room to Expand
Floating floors aren’t attached to the subfloor, which allows natural expansion and contraction without causing damage. However, if the floor is wedged tightly against walls or fixed objects, it has nowhere to expand. The result? Buckling, lifting, or tremendous pressure against whatever’s blocking movement.
This expansion isn’t hypothetical—it’s measurable and inevitable. Temperature fluctuations and humidity changes cause the entire floor to expand and contract as a single unit. Without perimeter gaps, this movement has to go somewhere, and it usually goes up.
Standard Expansion Gap Recommendations
Most manufacturers specify 10-12mm expansion gaps around all fixed objects—walls, door frames, cabinets, and pipes. In rooms exceeding 12 metres in length or width, additional expansion joints may be required to break the floor into manageable sections.
These gaps get hidden beneath skirting boards, scotia, or transition strips, so they don’t affect aesthetics. The key is maintaining them consistently around the entire perimeter and ensuring nothing pins the floor down.
Common Areas Where Expansion Gaps Are Missed
Door frames and architraves are frequent culprits—installers fit planks too tightly into these spaces, leaving insufficient gap. Heavy furniture, particularly items expected to remain permanently, sometimes gets placed on the floor before expansion gaps are properly maintained.
Kitchen installations present particular challenges. Planks run under dishwashers, against cabinet toe kicks, and around island bases—all areas where maintaining proper gaps requires careful measurement and cutting.
Signs of Expansion-Related Flooring Damage
Buckling or peaking—where planks lift in the middle of the room—is the classic sign of insufficient expansion space. You might notice planks pushing upward, creating ridges or tent-like formations. This typically occurs during warm, humid periods when materials expand maximally.
Pressure against skirting boards sometimes manifests as boards being pushed away from walls or cracking paint along the floor-wall junction. In severe cases, the entire floor might feel springy or bounce underfoot as it tries to expand against restraints.
Starting With a Crooked First Row
The first row of hybrid flooring sets the foundation for the entire installation. Get it wrong, and every subsequent row compounds the error.
Why the First Row Determines the Entire Installation
Each row of planks aligns with and locks against the previous row. If your first row runs crooked—even slightly—every row thereafter follows the same angle. By the time you reach the opposite wall, you might find yourself several centimetres out of square.
This misalignment creates problems beyond aesthetics. Planks that don’t run parallel to walls require increasingly severe angle cuts to fit. These cuts expose more of the plank’s core material and create weak points where damage is more likely.
How Misalignment Compounds Across the Floor
A first row that’s 5mm out of parallel might seem insignificant. But across a 4-metre room, that 5mm becomes 50mm or more of deviation. What starts as barely noticeable becomes glaringly obvious, with planks running visibly crooked relative to walls and doorways.
The problem intensifies in open-plan spaces where flooring runs through multiple rooms. A crooked start in one room affects the entire continuous installation, potentially requiring complete removal and reinstallation to correct.
Tools Used to Ensure Straight Layouts
Chalk lines provide the most reliable reference for the first row. Snap a line parallel to your starting wall, accounting for the expansion gap, then align the first row to this line rather than trusting the wall itself (walls are rarely perfectly straight).
Laser levels offer another option, particularly in large rooms. They project a perfectly straight reference line that’s easier to work with than chalk. Spacers maintain consistent expansion gaps, while clamps or weights hold the first row in position while you build out from it.
Layout Planning Before Installation Begins
Smart installers measure the room and calculate plank layout before opening boxes. This planning identifies potential problems—like ending with a very narrow strip against the far wall—that can be avoided by adjusting where you start.
Dry-fitting the first few rows without locking them together lets you visualise the final result and make adjustments. It’s much easier to reposition planks during this stage than after you’ve locked dozens of rows in place.
Poor Plank Staggering and Layout Planning
Random-looking plank arrangements aren’t actually random—they follow specific principles that maximise strength and visual appeal.
Why Staggered Joints Strengthen the Floor
Staggering end joints prevents continuous seams from running across the floor, which would create weak lines where planks could separate. Proper staggering distributes stress across the floor, preventing any single line from bearing disproportionate force.
Think of it like brickwork—offset joints create interlocking strength. The same principle applies to hybrid flooring. When joints align across multiple rows (called H-joints or step patterns), the floor becomes structurally weaker along those lines.
Minimum Distance Between End Joints
Industry standards typically require at least 300mm between end joints in adjacent rows. This spacing ensures adequate overlap for structural integrity. Some manufacturers specify even greater distances—400mm or more—particularly for wider planks.
Maintaining these minimums throughout the installation requires planning, especially as you approach walls or work with specific plank lengths. Running out of suitable lengths late in the installation often leads to compromised joint spacing.
Avoiding Repeating Patterns
Beyond structural considerations, poor staggering creates visual monotony. Repeating patterns—where joints fall at similar intervals row after row—draw the eye and look amateurish. The goal is randomised but adequately spaced joints that create visual interest.
This is easier to achieve with planks of varying lengths. If you’re working with uniform-length planks, you’ll need to cut pieces strategically to break up patterns, which increases waste but improves results.
How Layout Planning Improves Visual Appeal
Thoughtful planning avoids tiny slivers along walls and ensures the flooring flows naturally through doorways. Calculate whether planks will run continuous through transitions or require joining, and plan joint locations accordingly.
Consider how natural light hits the floor—planks running parallel to the primary light source tend to show fewer seams and create a more expansive feel. In narrow hallways, running planks lengthwise makes spaces feel longer.
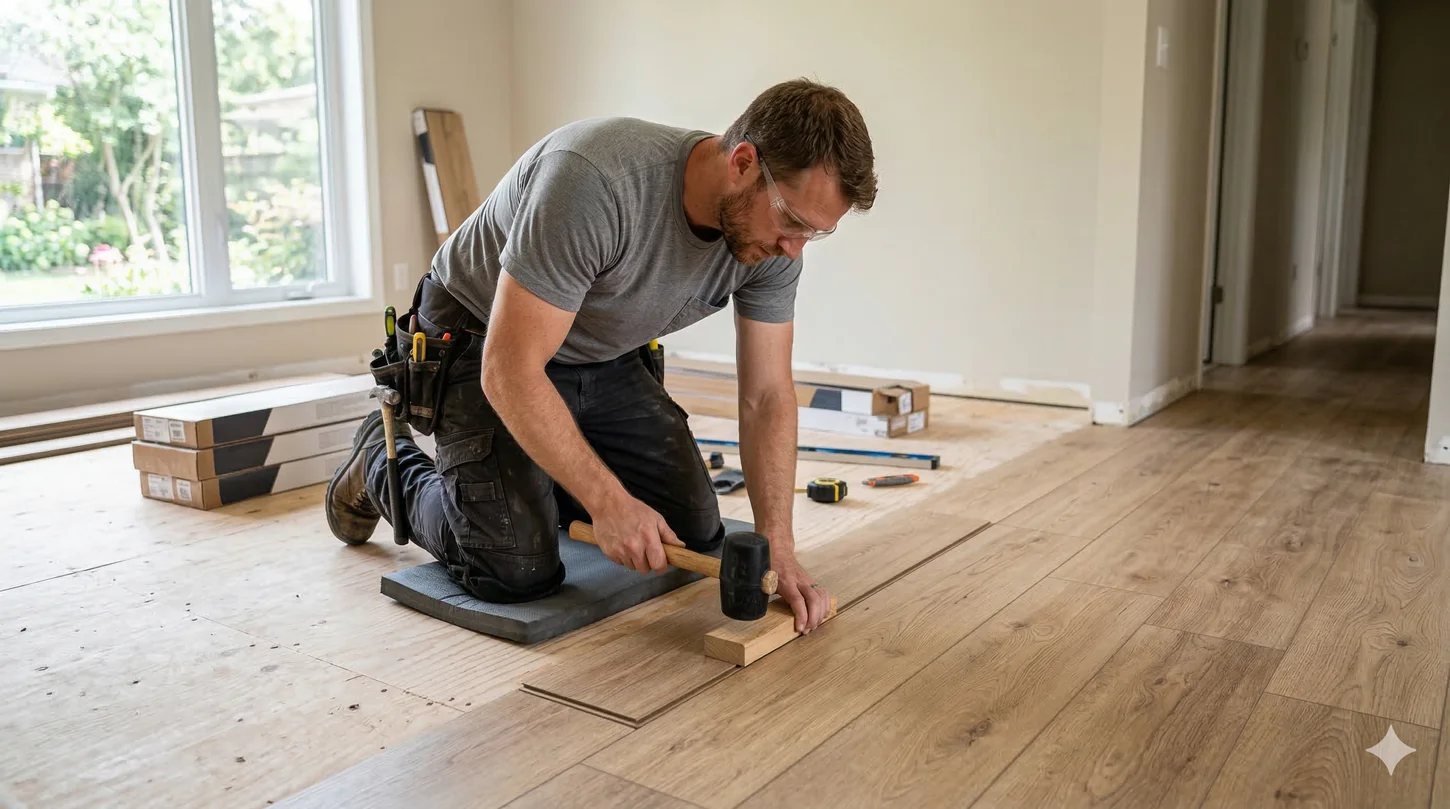
Forcing Planks Into Place
When planks don’t click together easily, the instinct is to push harder. Resist it. Force causes damage that might not be obvious immediately but will cause problems eventually.
How Click-Lock Systems Are Designed to Work
Modern hybrid flooring uses precision-engineered click-lock systems where planks angle together and snap into place with moderate pressure. The locking profiles are shaped to guide planks into alignment when positioned correctly.
These systems work through geometry, not force. When you find the correct angle—typically 20-30 degrees—planks slide together and lock with a satisfying click. If you’re fighting the planks, something’s wrong with the approach, not the amount of force needed.
Damage Caused by Incorrect Installation Tools
Hammering planks directly damages locking edges. The plastic or composite materials chip, compress, or fracture under impact. Even when protected by tapping blocks, excessive force crushes the delicate locking profiles that hold everything together.
Metal tools can scratch or dent visible surfaces. Pry bars applied incorrectly break off locking tongues. Once damaged, these edges won’t hold neighbouring planks securely, creating loose spots that worsen with use.
Signs the Locking System Has Been Damaged
Planks that won’t stay together after installation indicate damaged locks. You might notice planks that pull apart when walked on, or gaps that appear and disappear with traffic. Sometimes you’ll see splintered edges or crushed profiles when you lift planks to inspect them.
Forced installations also create stress fractures that don’t show immediately. Over weeks or months, these develop into cracks that run through planks, particularly near locking edges where force was concentrated.
Tools Recommended for Hybrid Flooring Installation
Tapping blocks distribute force evenly across plank edges, preventing localised damage. They’re essential for the last row and tight spaces where you can’t get proper angles for clicking planks together.
Pull bars help seat the last plank in each row without direct hammering. Rubber mallets provide controlled force without the harsh impact of claw hammers. Spacers maintain expansion gaps while leaving hands free for positioning planks.
Installing Flooring Over Moisture-Affected Subfloors
Moisture is hybrid flooring’s silent enemy. While the flooring itself resists water beautifully, moisture in the subfloor creates serious problems.
Why Moisture Testing Is Important
Even dry-looking concrete can contain significant moisture, particularly in new construction or after wet weather. This moisture can migrate upward, affecting the flooring installation. Moisture testing before installation identifies problem areas before they cause damage.
Testing is quick and inexpensive compared to repairing moisture damage after installation. It’s particularly important for concrete slabs, below-grade installations, and any subfloor with a history of moisture issues.
Moisture Risks With Concrete Slabs
Concrete slabs retain moisture for months after pouring. Even old slabs can develop moisture problems from rising damp, poor drainage, or plumbing leaks. Moisture meters measure moisture content as a percentage or use calcium chloride tests to measure emission rates.
Gold Coast’s humidity can slow concrete drying times and introduce additional moisture into slabs. Coastal homes face particular risks from salt-laden moisture that can be especially damaging.
Vapour Barriers and Moisture Protection
Vapour barriers prevent moisture migration from subfloors to flooring. They’re particularly important over concrete slabs but can benefit any installation with potential moisture concerns. Some underlayments include integrated vapour barriers; others require separate barrier films.
Installation quality matters—overlapping seams properly, taping joints, and ensuring complete coverage without tears. A poorly installed barrier is worse than none at all, creating false confidence while moisture finds gaps.
How Moisture Leads to Flooring Failure
Moisture causes hybrid flooring to swell, particularly at joints where water can penetrate the core materials. This swelling lifts planks, breaks locking mechanisms, and creates permanent damage. Even after moisture subsides, affected planks rarely return to original dimensions.
Prolonged moisture exposure can also promote mould growth beneath the flooring and damage subfloors. The problem compounds—as planks lift and separate, more moisture enters, accelerating deterioration.
Using the Wrong Underlay (or None at All)
Not all hybrid flooring requires underlay, but when it does, using the correct type matters enormously.
When Hybrid Flooring Requires Underlay
Some hybrid products include integrated underlay attached to the planks. These don’t need additional underlay—adding it creates problems. Other products require separate underlay to be rolled out before installation.
The flooring manufacturer’s specifications dictate requirements. Using underlay when it’s not specified, or skipping it when required, both cause issues. When in doubt, check with your supplier or the manufacturer’s installation guide.
The Role of Underlay in Noise Reduction
Quality underlay dampens footfall noise and reduces sound transmission between floors—particularly important in multi-storey homes. It cushions the flooring slightly, creating a more comfortable walking surface that feels more like timber than concrete.
Acoustic underlay is specifically designed for noise reduction, with denser compositions that absorb sound vibrations. In apartments or townhouses where noise transmission matters, investing in better underlay pays dividends.
Moisture Protection and Comfort
Underlay with moisture barriers protects against minor subfloor dampness. It also provides thermal insulation, making floors feel warmer underfoot—a benefit during Gold Coast’s occasional cool mornings.
The slight cushioning effect reduces fatigue during prolonged standing and provides a small amount of give that makes the floor more forgiving of minor subfloor imperfections.
Problems Caused by Incorrect Underlay Thickness
Too-thick underlay allows excessive floor movement, stressing locking systems and creating spongy, unstable feeling underfoot. Too-thin underlay fails to provide adequate sound dampening or minor levelling benefits.
Combining integrated underlay products with additional underlay creates excessive cushioning. The floor bounces unnaturally, locking mechanisms release, and planks separate. This mistake is surprisingly common among DIY installers who assume more cushioning is better.
Installing Cabinets or Fixed Objects on a Floating Floor
Floating floors need to float. Pinning them down with heavy fixtures defeats the design and creates significant problems.
How Floating Floors Are Designed to Move
The entire floor expands and contracts as a single unit, sliding slightly across the subfloor. This movement is normal and necessary. Any restriction prevents this natural expansion, causing stress that manifests as buckling, gaps, or damaged joints.
The floor needs to move freely not just at the perimeter, but throughout its entire area. Heavy objects placed directly on the floor are fine—they move with it. Fixed objects that penetrate through to the subfloor create anchor points that restrict movement.
Why Heavy Fixtures Restrict Expansion
Kitchen islands, built-in cabinets, and permanent partitions often extend through flooring to the subfloor for stability. When installed after flooring, they create immovable obstacles around which the floor must expand—except it can’t, so it buckles instead.
The weight isn’t the issue—it’s the attachment to the subfloor. A heavy refrigerator sits fine on hybrid flooring. A kitchen island bolted through the flooring to concrete beneath creates a disaster waiting to happen.
Kitchen Islands and Built-In Cabinet Considerations
Proper installation requires cutting flooring around fixed objects with appropriate expansion gaps. The island or cabinet sits directly on the subfloor, and flooring terminates around it with gaps hidden by trim or custom covers.
Alternatively, install fixed objects first, then float the floor around them. This approach requires precise cutting and planning but ensures the floor can move freely while maintaining a finished appearance.
Best Practices for Installation Around Fixtures
Create expansion gaps around any fixed object just as you would at walls—typically 10-12mm. Use transition strips, custom trim, or covers to hide gaps while maintaining functionality. Never nail, screw, or glue through floating floors into the subfloor.
For fixtures that must be installed after flooring (like certain built-in units), plan for removable sections of flooring or install the flooring in sections with appropriate transition strips at boundaries.
Rushing the Installation Process
Quality flooring installation takes time. Rushing introduces errors that range from annoying to catastrophic.
Why Precision Matters in Flooring Installation
Every cut needs to be accurate. Every plank needs to lock properly. Every measurement needs checking. Hurrying through these steps saves minutes but creates hours of repair work—or permanent imperfections you’ll notice every time you walk through the room.
Precision becomes even more critical as installation progresses. Early mistakes might be correctable; late-stage errors often require removing large sections to fix properly.
Common Errors Caused by Working Too Quickly
Miscalculated cuts waste materials and create gaps. Forced planks damage locking systems. Skipped acclimatisation or subfloor prep creates problems that appear weeks later. Rushed measurements lead to poor layout planning and awkward transitions.
These mistakes aren’t just aesthetic—they compromise durability and function. A floor installed hastily might look acceptable initially but fails prematurely under normal use.
Cutting Mistakes Around Doorways and Corners
Complex cuts around door frames, heating vents, and irregular corners require patience and test-fitting. Rushed cuts leave gaps too wide to hide or create planks that don’t fit properly, requiring new pieces and wasted material.
Undermining door frames (cutting them to allow flooring to slide beneath) needs careful depth setting and steady hands. Rushing creates uneven cuts that show or prevent proper flooring insertion.
The Importance of Checking Each Row
Verifying each row’s alignment before proceeding prevents compound errors. Check that planks are fully locked, joints are properly staggered, and the row remains parallel to your reference line. Catching problems early saves enormous effort later.
Taking time to clean dust and debris between rows prevents particles from interfering with locking mechanisms. It’s tedious but prevents loose planks and gaps.
Neglecting Finishing Details
Installation doesn’t end when the last plank goes down. Finishing details separate professional results from obvious DIY jobs.
Incorrect Installation of Skirting Boards or Scotia
Skirting boards or scotia moulding should attach to walls, not flooring. Nailing them to the floor defeats the purpose of expansion gaps by pinning the floor in place. This common mistake often goes unnoticed until seasonal changes cause buckling.
Scotia should sit against both floor and wall but only attach to the wall. It covers the expansion gap while allowing the floor beneath to move freely. Getting this right requires careful positioning and proper fastener placement.
Forgetting Transition Strips Between Rooms
Doorways and room transitions need proper strips that accommodate the expansion gap while providing a finished appearance. Skipping these leaves gaps exposed and creates trip hazards. Using incorrect transition types—like T-moulding where reducers are needed—looks unprofessional.
Transitions also serve functional purposes beyond aesthetics. They prevent moisture migration between rooms and accommodate height differences between flooring types.
Doorway and Threshold Finishing Errors
Door frames need proper clearance for flooring to slide beneath without binding. Inadequate undercuts leave visible gaps. Excessive removal weakens frames. Finding the sweet spot requires careful measurement and test-fitting.
Thresholds at exterior doors need weatherproofing while allowing floor movement. This often requires adjustable transition strips specifically designed for these applications.
Final Inspection Before Completing Installation
Walk the floor carefully, checking for loose planks, visible gaps, or alignment issues. Test locking by attempting to pull planks apart gently. Verify expansion gaps around the perimeter haven’t been compromised.
Clean thoroughly—installation dust settles into crevices and dulls the finish. Inspect cuts around obstacles and ensure trim pieces fit properly. Address problems now before furniture goes back and access becomes difficult.
Signs Your Hybrid Flooring Was Installed Incorrectly
Recognising installation problems early allows for quicker resolution before minor issues become major failures.
Buckling or Lifting Planks
Planks that tent upward or create ridges across the floor indicate insufficient expansion gaps or moisture problems. This typically appears during warm, humid periods when materials expand maximally. Severe cases can develop within weeks of installation.
Buckling that appears near walls suggests the perimeter gap is compromised. Buckling in the floor’s centre points to fixed objects restricting movement or moisture-related swelling.
Gaps Appearing Between Boards
Small gaps might indicate normal seasonal movement, but significant or growing gaps suggest installation problems. Inadequate acclimatisation, damaged locking systems, or improper subfloor preparation all create gaps that worsen over time.
Gaps that open and close with traffic indicate loose planks—a sign of damaged locks or improper installation. These planks will only loosen further with use.
Squeaking or Movement Underfoot
Squeaking suggests planks rubbing against each other or moving against the subfloor—neither of which should happen. Uneven subfloors, missing underlay, or damaged locking systems create these noises.
Floors that feel bouncy or unstable indicate excessive underlay, uneven subfloors, or planks not properly locked together. The floor should feel solid and stable throughout its entire area.
Visible Alignment Issues
Crooked rows, mismatched pattern continuity through doorways, or planks running noticeably non-parallel to walls all signal poor installation. These problems don’t get better with time and often require professional correction.
Misaligned planks also create functional problems—they’re harder to clean, trap more dirt, and wear unevenly.
How to Avoid Hybrid Flooring Installation Mistakes
Prevention is infinitely easier than correction. Here’s how to stack the odds in your favour.
Proper Planning Before Installation
Measure carefully and calculate material requirements with 10% extra for cuts and waste. Plan the layout on paper, identifying potential problems and solutions before opening boxes. Account for door clearances, transitions, and fixture placements.
Create a timeline that includes acclimatisation periods, subfloor preparation, and installation itself. Don’t schedule installation around immovable deadlines—rushed jobs invite mistakes.
Following Manufacturer Guidelines
Every product has specific requirements detailed in installation guides. Read them thoroughly. Manufacturers engineer products for specific conditions and specify requirements for a reason—deviating invites failure.
Pay particular attention to environmental conditions (temperature and humidity ranges), acclimatisation periods, expansion gap specifications, and approved installation methods. These aren’t suggestions; they’re requirements for warranty validity.
Using the Right Tools and Materials
Quality tools produce better results and make installation easier. Proper tapping blocks, pull bars, spacers, and cutting tools aren’t expensive compared to materials, yet they dramatically improve outcomes.
Use recommended underlayment types and moisture barriers. Cheap alternatives might save money initially but often cost more through premature failures or poor performance.
When Professional Installation Is the Better Option
Complex layouts, large areas, challenging subfloors, or lack of appropriate tools all justify professional installation. The cost difference between DIY and professional installation is often smaller than expected when you factor in tool purchases, material waste, and time investment.
Professionals complete jobs faster, with better results, and typically offer warranties covering both materials and labour. For many homeowners, particularly in busy Gold Coast households, this represents better value despite higher upfront costs.
Award Carpets Gold Coast – Your Hybrid Flooring Installation Experts
Getting hybrid flooring installation right requires knowledge, experience, and attention to detail. At Award Carpets Gold Coast, we’ve spent over 30 years helping local families and businesses achieve beautiful, long-lasting flooring results.
As an independent family-run business, we combine competitive pricing with honest advice and expert workmanship. We stock leading Australian hybrid flooring brands and unique boutique options you won’t find elsewhere, all suited to Gold Coast’s coastal climate.
Whether you’re considering DIY installation and need guidance on materials and techniques, or you’d prefer to leave the entire project to experienced professionals, our team is ready to help. We’ll walk you through product selection, explain what proper installation involves for your specific situation, and deliver results that look great and perform brilliantly for decades.
Visit our showroom to see hybrid flooring options firsthand and discuss your project with our experienced team. We offer free quotes and honest assessments—if DIY makes sense for your situation, we’ll tell you. If professional installation is the better choice, we’ll explain why and provide transparent pricing.
Don’t let installation mistakes compromise your flooring investment. Whether you choose to tackle the project yourself or work with professionals, understanding these common pitfalls ensures your hybrid floor delivers the durability, beauty, and performance you’re paying for.
Contact Award Carpets Gold Coast today to explore your hybrid flooring options and get expert advice on installation. Your floors are too important to get wrong—let’s make sure they’re done right from the start.